reviewed by Christina Lopez
What if the humble container sitting on a nursery shelf was quietly determining whether a plant thrives or struggles? That's not an exaggeration. Plastic pots for plants are the most widely used containers in home gardening — yet most people grab them without much thought. Size, material grade, drainage design, UV resistance — these details quietly add up. Get them right and plants flourish. Get them wrong and the same time and money produces disappointing results. This guide covers every angle worth knowing: types, benefits, what to look for when buying, step-by-step setup, common mistakes, myths, and how to fix problems when they come up.
Plastic pots come in a far wider variety of styles and materials than most gardeners expect. From basic nursery grow pots to self-watering reservoirs and UV-stabilized outdoor planters, there is a plastic container designed for nearly every situation. Gardeners looking to explore a broad range of plant growing options can browse the plants, herbs, and farming category for related guides and tips. Understanding the differences between pot types makes it much easier to match the right container to the right plant — and avoid wasting money on the wrong one.
The sections below break everything down in plain, practical terms. No unnecessary jargon. Just useful information that applies whether someone is repotting a single houseplant or building out a full container garden on a patio or balcony.
Contents
The case for plastic pots goes well beyond price. While the low upfront cost is a real advantage, the long-term picture is even more compelling. A quality plastic pot, used correctly and stored out of direct sunlight during off-seasons, can last many years without cracking, chipping, or degrading in the way that cheaper clay or ceramic alternatives often do.
The table below compares the four most common container types across the factors that matter most to everyday gardeners.
| Container Type | Avg. Cost (6–10 inch) | Weight | Durability | Moisture Retention | Best For |
|---|---|---|---|---|---|
| Plastic | Low ($1–$8) | Very light | High (UV-grade) | High | Most plants, beginners, balconies |
| Terracotta / Clay | Medium ($5–$20) | Heavy | Moderate (fragile) | Low (porous) | Succulents, cacti, Mediterranean herbs |
| Ceramic / Glazed | High ($15–$60+) | Very heavy | Moderate (chips) | Medium | Decorative indoor use |
| Fabric / Grow Bag | Low–Medium ($3–$15) | Very light | Moderate (wears) | Low (breathable) | Root vegetables, air-pruning |
For most home gardeners — especially those growing herbs, vegetables, or tropical houseplants — plastic wins on cost, convenience, and moisture retention. That last point matters: plastic does not draw moisture out of the soil the way porous materials do, which means less frequent watering and more stable root conditions.
Well-made plastic pots can be cleaned, sterilized, and reused across multiple growing seasons. That makes them more economical than they appear at first glance. Here's what contributes to a plastic pot's lifespan:
Proper storage between seasons — ideally indoors or in shade — adds years to a plastic pot's useful life. Rinsing with a diluted bleach solution between uses also prevents disease carryover from plant to plant.

Plastic containers carry a reputation that is not entirely fair. A few persistent myths have shaped how gardeners think about them — and some of those myths are simply wrong. Here is a balanced look at the most common ones.
This concern usually traces back to fears about chemicals leaching from plastic into soil. In practice, food-safe and BPA-free plastics — which cover most pots sold today — do not release harmful levels of chemicals into potting mix under normal use. The real root problems in plastic pots come from poor drainage and overwatering, not the plastic itself.
What to check instead:
Clay and terracotta are excellent for specific plants — particularly those that need fast-draining, dry conditions, like succulents and Mediterranean herbs. But for moisture-loving plants, tropical species, or anything that needs consistently moist soil, plastic is the better performer. Clay dries out quickly and requires more frequent watering. Neither material is universally superior; the plant's needs determine the right choice.
This is one of the more costly misconceptions. Thin, low-grade plastic pots may cost less upfront but tend to crack, warp, or become brittle within a season or two — especially outdoors. Polypropylene (PP), a commonly used plastic in quality garden pots, is known for its durability, chemical resistance, and ability to handle repeated freeze-thaw cycles. Checking the recycling code on the base of a pot (PP is marked with a 5) gives a quick indication of material quality.
Not every plastic pot suits every gardener. Experience level plays a real role in which features matter most. A beginner potting a first herb plant has different needs than someone managing a collection of tropical specimens or growing vegetables through winter.
For gardeners just starting out, simplicity and forgiveness are the priorities. The best beginner plastic pots share a few traits:
Starting with mint is a popular choice — it's forgiving, fast-growing, and gives beginners clear feedback on whether their watering habits are working. The full guide on how to grow mint in pots covers setup, soil mix, and care tips in detail. A standard 6–8 inch plastic pot with drainage works perfectly for this plant.
Gardeners with more experience tend to prioritize function over simplicity. The features that matter at an intermediate or advanced level include:
Experienced growers also tend to standardize on one or two pot sizes to simplify watering schedules, soil mixes, and fertilization routines.
Walking into a garden center or browsing online, the range of plastic pots available can be overwhelming. Knowing exactly which features matter — and which are mostly cosmetic — makes the decision straightforward.
Drainage is the single most important structural feature of any container. Plastic pots without drainage holes should only be used as decorative outer sleeves (cachepots), not as direct growing containers. What to look for:
Pro tip: If a decorative plastic pot lacks drainage, place a smaller plastic grower's pot with drainage holes inside it — the outer pot becomes a cachepot, and the plant still drains properly.
Matching pot size to plant size prevents two common problems: underwatering from too-small pots and root rot from too-large ones. General guidelines:
Depth matters as much as diameter. Shallow pots suit plants with fibrous root systems (lettuce, herbs, strawberries). Deep pots are essential for tap-rooted vegetables like carrots and parsnips.
For outdoor use, UV stability is non-negotiable. Pots labeled "UV-resistant" or "UV-stabilized" contain additives that slow the degradation that comes from prolonged sun exposure. Without these additives, plastic becomes brittle and starts cracking within one to two seasons outdoors. Look for:
Repotting into a new plastic container is a straightforward process when done in the right order. Skipping steps — especially around soil preparation and drainage setup — accounts for a significant share of early plant failures in containers.
For gardeners repotting seedlings from trays or starter cells, the process of root handling is especially important. The guide on how to transplant seedlings without killing them covers the critical details around root disturbance, hardening off, and post-transplant care.
Most plant failures in plastic pots come down to a handful of avoidable errors. Knowing what these mistakes look like — and why they happen — makes it much easier to catch them early.
Plastic pots retain moisture well, which is a benefit. But it becomes a problem when gardeners water on the same schedule regardless of actual soil moisture. Signs of overwatering in plastic pots:
The fix is simple: water only when the top inch or two of soil feels dry when a finger is pressed into it. Frequency varies by plant, pot size, temperature, and humidity — no fixed schedule works for all situations.
Too small: roots become crowded, nutrients deplete quickly, and the plant wilts rapidly between waterings. Too large: excess soil stays wet between waterings, which promotes root rot even with good drainage. The right approach is to pot up gradually — moving to a container only one to two inches larger in diameter each time the plant outgrows its current pot.
Warning: Jumping from a 4-inch pot directly to a 12-inch pot is one of the most common causes of root rot in houseplants — the excess wet soil around the roots creates conditions where pathogens thrive.
Plastic pots left outdoors year-round without UV protection will eventually become brittle and crack. This happens gradually, so it is easy to miss until a pot shatters while being moved. Prevention steps:
Even with the right pot and the right setup, problems can still develop. Most issues that appear in container-grown plants have identifiable patterns when examined closely. The plastic pot itself is rarely the root cause — but how it interacts with watering habits, light, and soil makes a significant difference.
Yellowing is one of the most common signals that something is off. Diagnosing correctly requires looking at the pattern:
In plastic pots specifically, yellow lower leaves combined with consistently wet soil almost always point to overwatering. Adjusting the watering schedule and improving drainage resolves most of these cases within a week or two.
Root rot (caused by water mold pathogens, most commonly Phytophthora and Pythium species) develops when roots sit in waterlogged conditions for extended periods. Plastic pots create conditions for root rot when:
If root rot is suspected, carefully remove the plant from the pot and inspect the roots. Healthy roots are white or cream-colored and firm. Rotten roots are brown or black, soft, and may smell foul. Trim all affected roots back to healthy tissue, treat with a diluted hydrogen peroxide solution, repot into fresh soil in a clean pot, and reduce watering frequency.
Dark plastic pots — especially black ones — absorb significantly more heat from sunlight than light-colored or white pots. In summer, soil temperatures inside a dark plastic container sitting in direct sun can reach levels that stress or damage roots. This is less of an issue in shaded spots or cool climates but can be a real problem in hot, sunny regions.
Solutions for overheating:
Most modern plastic pots sold for gardening are made from food-safe, BPA-free materials — typically polypropylene (PP, recycling code 5) or HDPE (code 2). These grades do not leach harmful chemicals into soil at the concentrations found in home gardens. For added confidence, gardeners can look for pots explicitly labeled "food-safe" or "BPA-free." Avoid using old or unknown-origin plastic containers, especially if they show signs of degradation or have a strong chemical smell.
Quality plastic pots made from UV-stabilized polypropylene or HDPE can last five to ten years or more when stored correctly between seasons. Budget pots without UV stabilizers may begin cracking or becoming brittle within one to two outdoor seasons. Proper care — rinsing between uses, storing out of prolonged sun exposure, avoiding harsh impacts — significantly extends lifespan regardless of quality level.
Tomatoes require significant root space. Determinate (bush) varieties grow well in 14-inch pots holding at least five gallons of soil. Indeterminate (vining) varieties perform best in containers of 18 inches or larger — ideally 10 to 15 gallons. Undersized pots result in stunted growth, rapid soil drying, and reduced yields. Deep pots are preferable to wide, shallow ones because tomato root systems grow primarily downward.
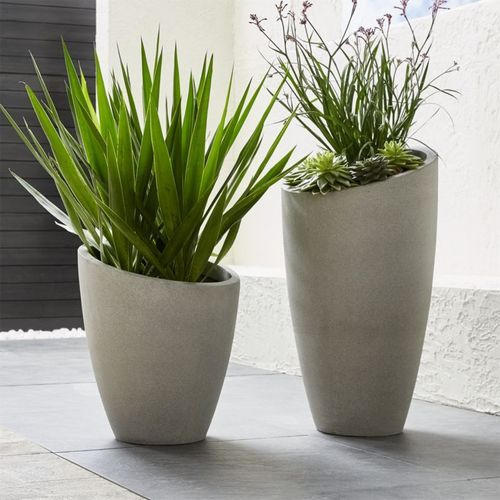
Plastic pots work very well indoors. They are lightweight, easy to clean, and retain moisture longer than terracotta, which reduces watering frequency. For aesthetic purposes, many gardeners place a plain plastic grower's pot inside a decorative ceramic or woven outer pot (called a cachepot). This gives the look of a premium container with the practical benefits of plastic drainage. Just be sure to empty the outer pot after watering to prevent the inner pot from sitting in standing water.
Plastic pots should be cleaned and sanitized between plant cycles — particularly when moving from a plant that struggled with disease or pests to a new one. A diluted bleach solution (1 part bleach, 9 parts water) applied for five to ten minutes, followed by a thorough rinse, removes most pathogens. Replace pots when they show physical degradation: cracking, brittleness, or discoloration that suggests UV breakdown. There is no fixed time interval — condition, not age, should drive the decision.
 |
 |
 |
 |

About Christina Lopez
Christina Lopez grew up in the scenic city of Mountain View, California. For eighteen ascetic years, she refrained from eating meat until she discovered the exquisite delicacy of chicken thighs. Christina is a city finalist competitive pingpong player, an ocean diver, and an ex-pat in England and Japan. Currently, she is a computer science doctoral student. Christina writes late at night; most of her daytime is spent enchanting her magical herb garden.
Get new FREE Gifts. Or latest free growing e-books from our latest works.
Disable Ad block to reveal all the links. Once done, hit a button below
|
|
|
|