My first peace lily sat on a shelf for two years before I realized I had been ignoring half its care needs. The lower leaves had turned yellow and mushy, the spent blooms were brown and limp, and I assumed the plant was simply dying. It wasn't — it was overdue for a proper prune. Learning how to prune a peace lily the right way transformed that struggling plant into a lush, blooming centerpiece. If your peace lily looks tired or overgrown, this guide gives you everything you need to fix it. If you're new to indoor plants altogether, you might also enjoy reading about how to grow a money plant, another low-maintenance favorite with similar care rhythms.

Peace lilies (Spathiphyllum spp.) rank among the most adaptable indoor plants you can grow, but "low maintenance" is not a license to ignore them entirely. Dead leaves, spent flowers, and overcrowded growth sap the plant's energy — energy it could be channeling into fresh blooms. Consistent, targeted pruning is what separates a thriving peace lily from one that just survives season to season.
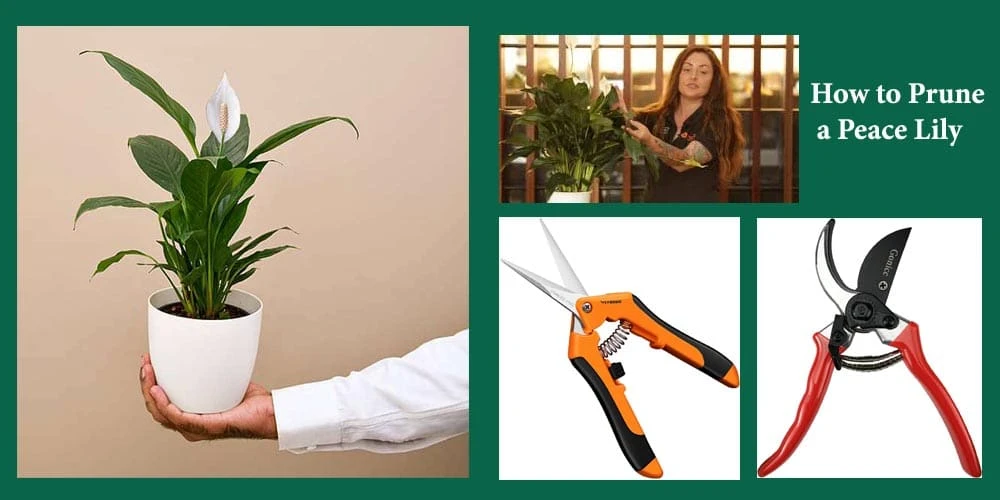
The techniques in this guide apply whether your plant is a compact countertop variety or a floor-standing specimen pushing three feet tall. You don't need specialized training — just the right information and a clean pair of scissors. Before you dive in, browse our gardening reviews for tool recommendations that make plant maintenance more efficient and precise.
Contents
Pruning isn't just about aesthetics. Every cut you make either helps or hinders the plant's health, so developing good habits from the start saves you from correcting damage later. These are the practices experienced growers follow consistently — not occasionally.
Peace lilies don't follow a rigid seasonal pruning schedule the way outdoor shrubs do, but timing still matters. Here's when to prune:
One insider observation: peace lilies in low-light conditions produce more yellowing leaves than those in bright indirect light. If you're pruning the same type of leaf repeatedly every few weeks, the real fix is repositioning the plant — not more aggressive cutting.
Your tool choice directly affects how quickly the plant heals. Ragged cuts from dull blades create entry points for bacteria and fungi that a clean, single-motion cut seals over naturally.
According to Wikipedia's entry on Spathiphyllum, the calcium oxalate content in peace lily tissues makes the plant mildly toxic to both pets and humans — another concrete reason to wear gloves and dispose of cuttings carefully rather than leaving them accessible to animals.
Here's the core process. Follow this every time you prune and you'll keep your plant in peak condition throughout the growing season and beyond.
Pro tip: Never remove more than one-third of the plant's total leaf mass in a single session — stripping too much at once stresses the root system severely and stalls recovery for weeks.
Deadheading is the most commonly skipped pruning task, and it's also one of the highest-impact ones. A spent peace lily bloom — the white spathe and the central spadix — continues drawing energy for weeks after it turns green and then brown.
If your plant hasn't bloomed in a long time, the answer usually isn't more aggressive pruning — it's light and nutrition. A consistent feeding routine using homemade fertilizer sticks delivers steady, gentle nutrition that encourages flowering without the concentration spikes that liquid fertilizers can cause.
Misinformation spreads fast in online gardening communities. These are the misconceptions that cause the most real-world damage to peace lily owners who follow them in good faith.
This claim circulates on gardening forums constantly. The idea is that removing healthy foliage "rejuvenates" the plant or "forces" new growth. It doesn't — not for peace lilies.
If your goal is more plants rather than a larger single specimen, propagation is the right approach. Leaf cutting propagation works with many houseplants, though peace lilies are most reliably multiplied through root division at repotting time rather than through stem or leaf cuttings.
New growers often expect visible new leaves within a week of a pruning session. That expectation consistently leads to frustration and over-pruning as people conclude their technique was wrong.
Patience is non-negotiable with peace lilies. Root health drives everything visible, and root health isn't something you can observe directly. If you're building out a broader indoor plant display alongside your peace lily, adding a terrarium setup nearby creates a striking textural contrast and shares the same indirect light preferences.

One of the underappreciated aspects of peace lily care is how inexpensive it is to do properly. Here's an honest, itemized breakdown of what you'll spend getting set up and what you save over time by maintaining the plant well.
| Tool | Estimated Cost | Necessary? | Notes |
|---|---|---|---|
| Bypass pruning shears | $8–$25 | Highly recommended | Best for clean cuts on stems up to ½ inch; lasts a decade with care |
| Sharp scissors | $0–$12 | Yes (minimum) | Adequate for flower stalks and thin leaf stems |
| 70% isopropyl alcohol | $2–$4 | Yes | Sterilize blades before each use; most households already have this |
| Disposable gloves (box) | $5–$10 | Recommended | Prevents sap irritation; one box covers months of maintenance |
| Spray bottle | $3–$8 | Optional | Useful for misting after heavy pruning sessions |
| Small collection bag | $0–$1 | Yes | Collect cuttings immediately to prevent mold and gnat attraction |
Your total startup investment runs between $18 and $60 if you purchase everything new. In practice, most households already own scissors and isopropyl alcohol. The only real purchase is a quality pair of bypass shears — and those last for years if wiped clean and stored dry.
The economic case for consistent pruning comes down to plant longevity. A peace lily that's regularly maintained:
Compare the cost of maintaining a single plant for 15 years against replacing neglected specimens every two or three years. The math strongly favors consistent care. For those interested in expanding their indoor garden economically, learning how to make a closed terrarium is a low-cost, self-sustaining display option that pairs beautifully with a well-pruned peace lily on any shelf or windowsill.
Where you are in your gardening journey determines how nuanced your pruning approach needs to be. Here's how to calibrate your technique to your current skill level without overcomplicating the process.
If you're new to plant care, pruning can feel daunting — the fear of cutting something you shouldn't is real. Start with these three rules and you'll avoid the most common costly mistakes:
Consistency beats perfection at this stage. Pruning once a month during active growth — even if you remove only one or two leaves — is far better than waiting months for a dramatic intervention. If you're building your indoor plant collection alongside your peace lily, growing catnip indoors is another beginner-friendly project that builds the same observational skills you'll use every time you assess a plant for pruning needs.
Once you're comfortable with the basics, these additional techniques improve both plant health and long-term aesthetics in ways casual maintenance won't achieve.
Advanced growers also benefit from keeping a simple pruning log — recording the date, what was removed, and the plant's response. Over one to two growing seasons, you'll identify your specific plant's bloom cycles, growth patterns, and ideal maintenance windows with a precision that no general guide can replicate.
Prune your peace lily as needed rather than on a fixed schedule. Check the plant weekly and remove any yellow, brown, or dead leaves and spent blooms as soon as you spot them. During active growing season, light maintenance typically occurs every two to four weeks for most plants.
Yes. Removing more than one-third of the plant's total leaf mass in a single session causes significant stress to the root system and stalls recovery noticeably. Err on the side of conservative cuts — you can always remove more in a follow-up session a week or two later.
Yes, but selectively. If only the tip of a leaf is brown, trim just the discolored portion with sharp scissors following the natural leaf shape. If more than half the leaf is brown or yellow, remove the entire stem at the base rather than leaving a partial stub that will continue to deteriorate.
Healthy leaf growth without blooms almost always points to insufficient light rather than a pruning issue. Peace lilies need bright indirect light to trigger flowering reliably. Reposition the plant closer to a filtered-light window and consider a balanced, diluted fertilizer application in early spring to support bloom production.
Dead and dying leaves accumulate and continuously drain nutrients from healthy growth. The plant becomes progressively leggy and sparse, bloom frequency drops, and the crowded, debris-filled base creates ideal conditions for fungus gnats, surface mold, and eventually root rot. Regular pruning is the single most preventable form of decline in this plant.
You can remove dead and yellow leaves at any time of year without issue. What to avoid in cooler months is heavy shaping or removing large quantities of healthy growth, since recovery is slower when the plant's growth rate is reduced. Stick to essential dead-leaf and spent-bloom removal during that period.
Yes, without exception. A wipe with 70% isopropyl alcohol takes under ten seconds and prevents cross-contamination of fungal and bacterial infections between plants. This is especially important if you maintain multiple houseplants in the same space, where a single infected tool can spread disease quickly.
Deadhead the flower stalk when the white spathe has fully turned green and begun drooping, or when it progresses to brown. Remove it while it still has some structure — cutting a green-turning stalk is easier than dealing with a dried, brittle one, and redirects energy to new growth sooner. Always cut the entire stalk down to the soil line, not just the bloom head.
Knowing how to prune a peace lily correctly is one of the simplest, highest-leverage skills in indoor plant care — and now you have the full picture, from timing and tool selection to advanced techniques and the myths worth ignoring. Grab a clean pair of scissors right now, inspect your plant, and make at least one cut you've been putting off; that single action sets a maintenance habit in motion that compounds into a healthier, more reliably blooming plant with every passing month.
 |
 |
 |
 |

About Christina Lopez
Christina Lopez grew up in the scenic city of Mountain View, California. For eighteen ascetic years, she refrained from eating meat until she discovered the exquisite delicacy of chicken thighs. Christina is a city finalist competitive pingpong player, an ocean diver, and an ex-pat in England and Japan. Currently, she is a computer science doctoral student. Christina writes late at night; most of her daytime is spent enchanting her magical herb garden.
Get new FREE Gifts. Or latest free growing e-books from our latest works.
Disable Ad block to reveal all the links. Once done, hit a button below
|
|
|
|