reviewed by Christina Lopez
Mix equal parts cocopeat, compost, and perlite — that's the core of any reliable homemade potting soil recipe India gardeners use across climates and container types. You don't need anything exotic or expensive. Every ingredient is available at your local nursery or agri-supply store, and the process takes less than an hour. If you're tired of commercial mixes that compact within weeks or drain poorly in monsoon season, making your own is the most practical solution you have.
India's growing conditions — hot summers, heavy monsoons, dry winters — demand a potting mix that handles moisture fluctuation without turning into a brick or washing away nutrients. Commercial mixes rarely account for this range. They're formulated for temperate climates, and most have synthetic fillers that break down within a season. Your homemade mix, built from organic Indian ingredients, adapts far better to local plant varieties and seasonal rhythms.
Whether you're growing curry leaf plants on a balcony, vegetables in grow bags on a terrace, or herbs in clay pots indoors, the same fundamental principles apply. Get the ratios right, understand what each ingredient contributes, and you'll have a mix that outperforms anything off the shelf. Browse our full resource on plants, herbs, and farming to see how the right potting mix fits into a complete home growing system.
Contents
The financial case for making your own potting mix is straightforward. A 5-kg bag of commercial potting mix in India typically runs ₹200–₹400 depending on the brand. Making the equivalent at home costs ₹60–₹120 using locally sourced ingredients. That's a 50–70% saving, and your homemade version will usually outperform the packaged product because you control what goes in.
| Ingredient | Quantity | Approx. Cost (India) | Where to Buy |
|---|---|---|---|
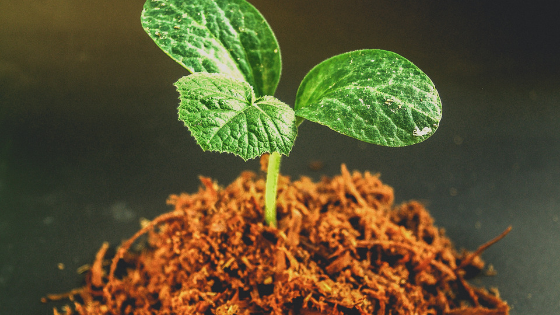
| Cocopeat (coir pith block) | 1 kg block | ₹30–₹60 | Nursery, agri-supply, online |
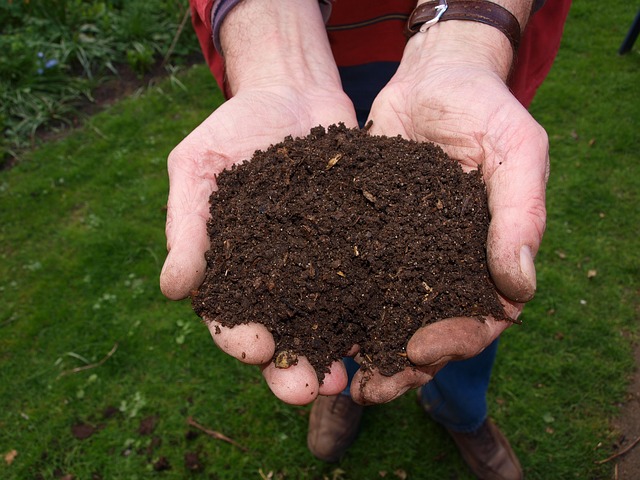
| Vermicompost or compost | 2 kg | ₹40–₹80 | Nursery, organic farms, home-made |
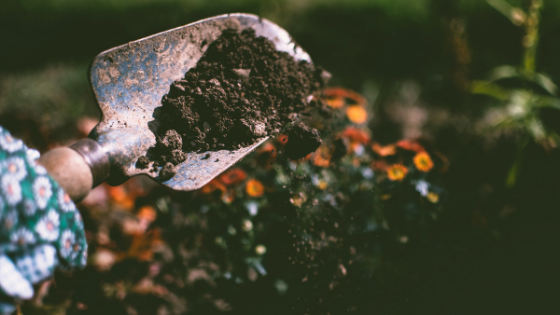
| Perlite or coarse river sand | 1 kg | ₹30–₹70 | Nursery, hardware stores |
| Neem cake powder | 500 g | ₹30–₹50 | Agri-supply stores, online |
| Bone meal (optional) | 500 g | ₹40–₹60 | Nursery, agri-supply |
| Dried cow dung manure | 1 kg | ₹20–₹40 | Local farms, nurseries |
Compost is the one ingredient you can produce at home for nearly zero cost. If you're not already composting, a practical starting point is our guide on worm composting at home — it's beginner-friendly and produces nutrient-dense castings that are ideal for potting mixes. If you want results faster, our comparison of hot composting vs cold composting helps you decide which method fits your space and timeline.
The real savings become visible when you're maintaining multiple containers or running a terrace setup. A modest garden of 20 pots needs roughly 40–60 liters of potting mix per season refresh. At commercial prices, that's ₹1,600–₹3,000. With your own mix, you're looking at ₹500–₹900 — and you can reuse and refresh the base rather than replacing it entirely each season. Over a full year, the difference is substantial.
If you're making potting soil for the first time, keep it to three ingredients. This ratio works for most vegetables, herbs, and flowering container plants grown in Indian conditions:
Mix these in a clean tub or on a tarp. Moisten the mixture before potting — dry cocopeat initially repels water, making it difficult for roots to establish contact with the medium. Dampen gradually and turn with a trowel until the mix feels like a wrung-out sponge: moist but not dripping. This three-part base is your reliable starting point for growing spinach, mint, onions, tomatoes, or curry leaf plants.
Once you're comfortable with the base recipe, refining it for specific plant families gives you noticeably better results. Indian growing conditions vary — the needs of a heavy-feeding vegetable in a monsoon-season terrace bed differ from a drought-tolerant succulent in a clay pot or a fruiting tree in a large container. Here's how to adjust your homemade potting soil recipe for each scenario:
Wood ash is another low-cost amendment worth considering if your mix tests acidic. It raises soil pH and adds potassium, making it particularly useful for fruiting plants. We detail exactly how and how much to use in our article on wood ash uses and benefits for plants.
The most common reason homemade mixes underperform isn't the ingredients — it's preparation. Texture and moisture level at the time of potting determine how well roots establish. Follow these non-negotiable practices on every batch:
Your base mix delivers a solid nutrient start, but Indian container gardens deplete quickly. Monsoon rains leach nutrients through drainage holes, and hot summers accelerate microbial activity that consumes organic matter. These natural amendments extend fertility without any synthetic fertilizers:
Mulching the surface of your container after planting helps retain the moisture and temperature balance you worked to create in the mix itself. Our detailed article on mulching materials and how to apply them covers which materials work best in container settings versus open garden beds.
You don't need a full tool shed to mix potting soil at home. The list is short, the cost is low, and most of it you probably already own. Here's what to have ready before you start:
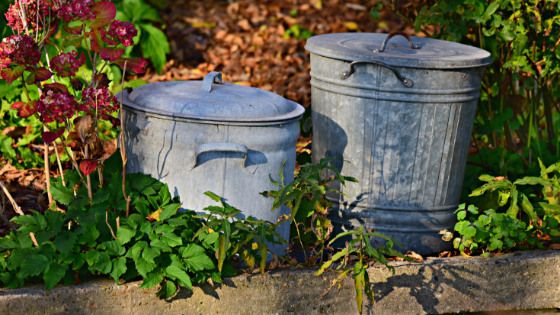
Making potting soil in batches saves significant time across a growing season. Prepare enough for four to six weeks at a time and store it in lidded containers kept away from direct sunlight and rain. Do not seal the containers airtight — the mix needs airflow to remain biologically active. An active microbial community in your stored mix is a benefit, not a problem, as long as moisture stays controlled.
During the high-humidity months from June through September across most of India, inspect stored mix every two weeks. White fungal threads on the surface are usually harmless saprophytic fungi — turn the pile to aerate it and the growth disappears within days. If you smell ammonia rather than earth, the mix is too wet and nitrogen is off-gassing. Spread it thin in shade, let it dry partially, then repack.
The most frequent complaint with homemade potting soil is compaction after several watering cycles. This almost always means insufficient perlite or coarse sand in the original mix — the organic matter binds together as it breaks down. You can fix mild compaction by top-dressing with a layer of coarse sand or perlite and working it lightly into the top 5 cm of soil with a chopstick or dibber. For pots that have fully compacted and are showing root stress, repot into fresh mix entirely.
Persistent waterlogging is the opposite problem, and it's equally damaging. If your container soil stays wet for more than two days after watering, your drainage is failing somewhere. Check that drainage holes haven't been blocked by roots or compacted soil. Add perlite to the top layer and work it in, and review your watering frequency. Overwatering is the leading cause of root rot in Indian container gardens. Our detailed guide on how to water indoor plants correctly covers how to calibrate frequency and volume for different container sizes and plant types.
Container mixes deplete faster than open garden beds because every watering cycle leaches some nutrients through the drainage holes. Recognizing the visual signs early lets you correct deficiencies before they set back plant growth significantly.
Adjusting your mix composition between seasons — rather than just top-dressing — is the most effective long-term fix. Potting soil composition affects every aspect of plant health, from root oxygen access to microbial activity to water retention. Treat your mix as a living system, not just a growing medium, and it will perform consistently across seasons.
The most reliable base recipe is 1 part cocopeat, 1 part vermicompost or well-aged compost, and 1 part river sand or perlite. This combination handles India's range of wet and dry seasons well — cocopeat manages moisture retention, compost provides nutrients, and sand or perlite ensures drainage. For vegetable-heavy setups, increase the compost slightly and add a small amount of neem cake powder to protect against soil pests.
You can include garden soil, but you should not replace cocopeat with it entirely. Garden soil compacts heavily in containers, restricts root aeration, and often introduces weed seeds or pathogens. If you want to use it, sterilize it first by baking at 80°C for 30 minutes and limit it to no more than one-third of the total mix volume. Cocopeat remains the better structural base for any container potting mix.
Cocopeat is widely available across India. You'll find it at local nurseries, agri-supply stores, and online marketplaces. It's sold in compressed blocks that expand significantly when hydrated — a 650-gram block typically yields around 8–10 liters of loose coir pith. Prices range from ₹30 to ₹80 per block depending on quality and brand. South Indian nurseries tend to stock it at lower prices due to coconut industry proximity.
A well-maintained homemade potting mix doesn't need complete replacement every season. Instead, remove and refresh the top 5–7 cm with fresh compost and perlite after each growing cycle. Full replacement is warranted every two to three years, or sooner if the mix has become heavily compacted, shows persistent disease, or drains poorly despite amendment attempts. Refreshing rather than replacing saves cost and retains the beneficial microbial community that builds up over time.
Vermicompost is the stronger choice for potting mixes specifically. It's finer in texture, more concentrated in available nutrients, and contains a broader range of beneficial microorganisms including bacteria and fungi that help suppress disease. Regular compost works well too, but it's more variable in nutrient content and may introduce weed seeds if not fully matured. Both are far superior to synthetic fertilizers for long-term container soil health.
A sour or ammonia-like smell from your potting mix usually means anaerobic conditions — the mix is too wet and compacted for oxygen to circulate. This happens when drainage is poor or when you've added too much fresh organic matter that hasn't finished decomposing. Fix it by letting the soil dry out partially, then turning the top layer to aerate. Prevent recurrence by reducing watering frequency and ensuring adequate perlite or sand in your mix ratio.
Yes, with preparation. Remove old roots, add fresh compost to replenish depleted nutrients, and check the texture — if it's compacted, work in additional perlite. If your previous plants suffered from disease, sterilize the old mix by solarizing under plastic for two to three weeks before reusing. Old mix that has performed well and shows no disease signs can be refreshed and reused indefinitely, which is one of the strongest arguments for making your own mix rather than buying packaged product.
Most vegetables and herbs grow best in a slightly acidic to neutral pH range of 6.0–7.0. You can test your mix with inexpensive pH test strips or a basic soil pH meter, both available in Indian agri-supply stores for ₹100–₹300. Cocopeat-based mixes tend to fall naturally in the 5.5–6.5 range, which suits most plants. If your mix tests alkaline above 7.5, add a small amount of well-aged compost or sulfur powder to bring it down. If it's too acidic below 5.5, a light application of wood ash raises pH gently without harsh chemicals.
The best potting soil you'll ever use is the one you made yourself — because you know exactly what's in it, and so do your plants.
 |
 |
 |
 |

About Christina Lopez
Christina Lopez grew up in the scenic city of Mountain View, California. For eighteen ascetic years, she refrained from eating meat until she discovered the exquisite delicacy of chicken thighs. Christina is a city finalist competitive pingpong player, an ocean diver, and an ex-pat in England and Japan. Currently, she is a computer science doctoral student. Christina writes late at night; most of her daytime is spent enchanting her magical herb garden.
Get new FREE Gifts. Or latest free growing e-books from our latest works.
Disable Ad block to reveal all the links. Once done, hit a button below
|
|
|
|