Hydroponics Herb Garden: A Complete Guide to Soilless Growing
reviewed by Christina Lopez
If you want to know how to grow herbs hydroponically, here's the short answer: replace soil with a nutrient-rich water solution, provide light, and let your roots do the rest. That's the core of it. Hydroponic herb gardens give you fresh basil, mint, cilantro, parsley, and more — year-round, indoors, in a fraction of the space a traditional garden needs. Whether you're brand new to growing or already diving into plants, herbs, and farming, this guide covers everything from choosing the right herbs to fixing common problems.
Hydroponics Herb Garden: Soil-less Growing
Hydroponics (growing plants without soil, in a water-based nutrient solution) has been around for decades, but it's more accessible than ever for home gardeners. You don't need a greenhouse or an engineering degree. A small countertop kit, the right nutrients, and a few hours of setup are all it takes. The payoff? Herbs that grow up to 50% faster than soil-grown plants, according to research summarized on Wikipedia's hydroponics page.
This guide is written for you — whether you're eyeing a tiny kitchen setup or planning something more ambitious. Let's get into it.
Not every herb performs equally in a soilless system. Some absolutely explode with growth. Others are more temperamental. Knowing what to plant first saves you time, money, and frustration.
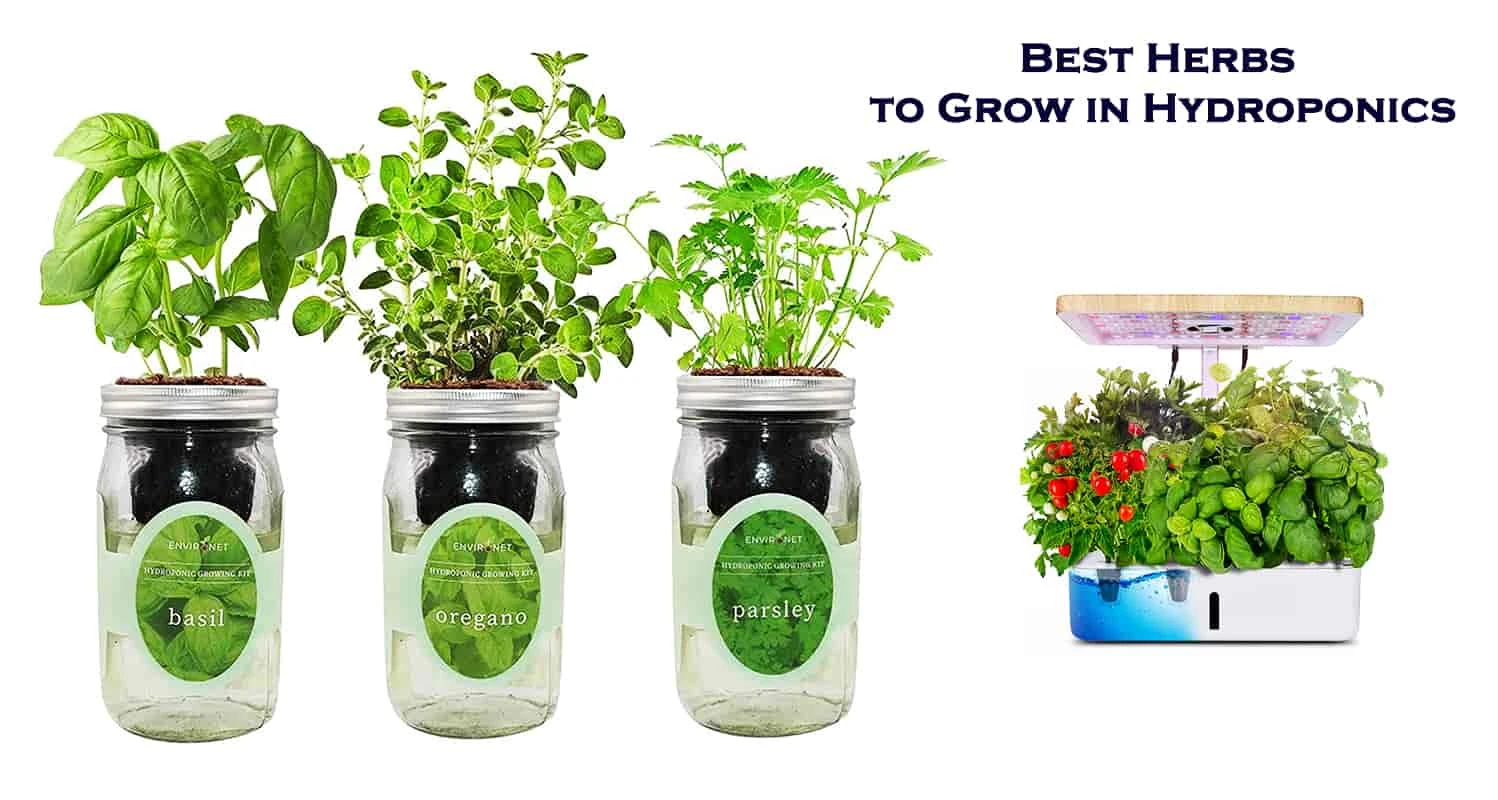
Best Herbs To Grow In Hydroponics
Fast-Growing Herbs for Beginners
These herbs are forgiving, fast, and perfect if you're learning how to grow herbs hydroponically for the first time:
Basil — loves warm water temps (65–80°F), grows fast, and tolerates frequent harvesting
Mint — nearly impossible to kill, spreads aggressively; keep it in its own reservoir
Chives — low nutrient needs, does well under standard grow lights, and regrows quickly after cutting
Cilantro — prefers cooler temps (60–70°F); bolts in heat, so watch your environment
Parsley — slow to start but very low maintenance once established
Once you've harvested your first batch of fresh basil or mint, you'll understand why so many home gardeners never go back to soil. And if you're wondering what to do with all that fresh mint, check out this guide on how to make homemade extracts — mint extract is one of the easiest and most satisfying projects you can do with homegrown herbs.
Herbs That Thrive in Water Systems
Here's a quick comparison of popular hydroponic herbs so you can plan your garden before you buy anything:
Herb
Ideal pH
Ideal Temp (°F)
Time to First Harvest
Difficulty
Basil
5.5–6.5
65–80
3–4 weeks
Easy
Mint
5.5–6.0
65–70
4–6 weeks
Easy
Cilantro
5.5–6.5
60–70
3–4 weeks
Easy
Chives
6.0–6.5
60–70
3–4 weeks
Easy
Parsley
5.5–6.0
65–75
6–8 weeks
Moderate
Rosemary
5.5–6.0
65–75
8–10 weeks
Moderate
Thyme
5.5–7.0
60–75
8–10 weeks
Moderate
Pro tip: Keep mint in its own separate reservoir. It's an aggressive grower and will crowd out every other herb in a shared system if you let it.
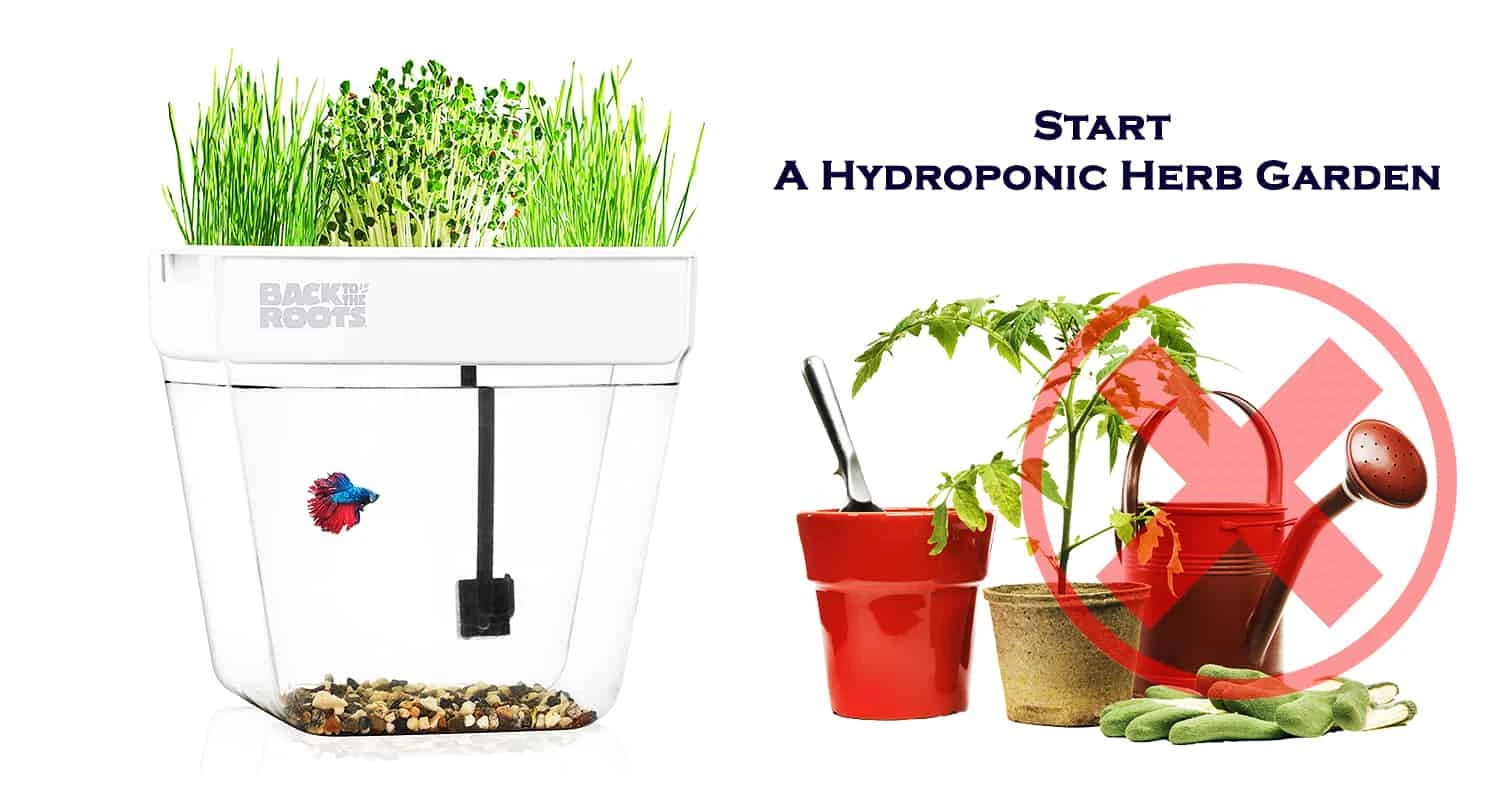
How to Grow Herbs Hydroponically: Step by Step
Start A Hydroponic Herb Garden
Ready to get your hands wet — literally? Here's exactly how to grow herbs hydroponically from scratch. This process works whether you're using a store-bought kit or building your own system from a storage tote.
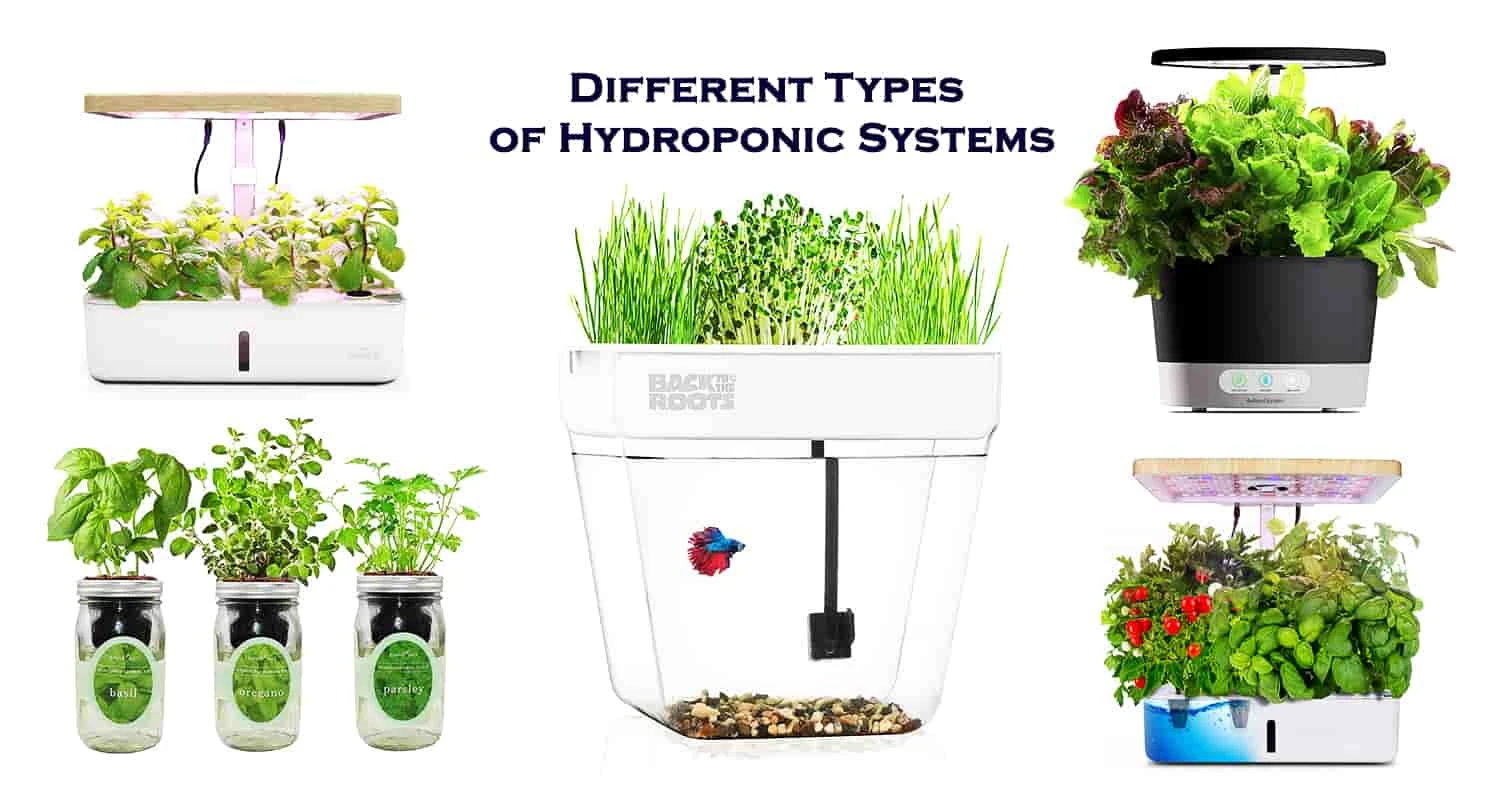
Choosing Your Hydroponic System
There are several hydroponic system types, but for herbs, these three are the most practical and beginner-friendly:
Different Types Of Hydroponic Systems
Deep Water Culture (DWC) — roots hang directly in oxygenated nutrient solution. The simplest and most beginner-friendly option.
Nutrient Film Technique (NFT) — a thin film of nutrients flows continuously past the roots. Great for fast-growing herbs at a slightly larger scale.
Kratky Method — a passive system with no pump required. Just a jar of water and nutrients. Perfect for basil, mint, and chives.
For most people learning how to grow herbs hydroponically, Deep Water Culture or the Kratky method are the smartest starting points. Low cost, low maintenance, high success rate.
Deep Water Culture(DWC) System
Setting Up and Planting
Follow these steps and you'll have a functioning hydroponic herb garden within an afternoon:
Choose your container — a 5-gallon bucket, storage tote, or mason jars all work. Dark containers prevent light from reaching the water and causing algae.
Add a growing medium — clay pebbles (hydroton), rockwool cubes, or perlite anchor your plant roots without soil.
Mix your nutrient solution — use a premixed hydroponic nutrient formula and follow the label. Start at half-strength for seedlings to avoid nutrient burn.
Test and adjust pH — herbs need pH between 5.5 and 6.5. Use a digital pH meter and adjust with pH Up or pH Down solutions. This guide on how to test soil pH explains the underlying principles well, and water pH testing works the same way.
Plant your seedlings or seeds — if starting from seed, germinate in rockwool cubes first. If using transplants, rinse every trace of soil off the roots before placing them in your system.
Set up your light — 14–16 hours of full-spectrum LED light per day is ideal for most herbs. A timer is essential.
Oxygenate the water — in a DWC system, run an air pump and air stone continuously. Roots need oxygen just as much as nutrients.
Monitor daily and top off — check water levels every day. Top off with plain pH-adjusted water between nutrient changes. Do a full reservoir change every 1–2 weeks.
Understanding how water interacts with your plants is just as important in hydroponics as in traditional gardening. The guide on how to water plants and herbs covers watering principles that are directly useful when managing your hydroponic reservoir routine.
Making Water Work For Hydroponics Herb Gardens
Beginner vs. Advanced: Which Setup Is Right for You?
Not everyone starts at the same place, and that's fine. Here's how to figure out which level of system matches where you are right now.
Simple Starter Setups
If you're just beginning to explore how to grow herbs hydroponically, keep it simple. You don't need to spend hundreds of dollars to get started.
Mason jar Kratky — $10–20 total. One plant per jar, passive system, no electricity or pump needed. Ideal first setup.
AeroGarden or Click & Grow — plug-and-play systems with built-in lights. Perfect for kitchen counters with zero setup headaches.
Small DWC tote — a 10-gallon tote with a small air pump and net pots. Easily grows 4–6 herb plants at once.
If indoor growing appeals to you, there's a lot of crossover knowledge between hydroponics and soil-based indoor setups. The guide to starting an indoor herb garden covers lighting, spacing, and environment tips that apply directly to your hydroponic layout.
Warning: Don't let your reservoir temperature climb above 75°F. Warm water holds less dissolved oxygen and creates the perfect environment for harmful root pathogens that can destroy your plants within days.
Advanced System Options
Once you're confident with the basics, you can scale up significantly. Advanced growers often move to one of these:
Nutrient Film Technique (NFT) channels — supports more plants per square foot, more efficient nutrient use, but requires timer management and regular pump maintenance
Vertical tower gardens — maximizes vertical space; a 4-square-foot footprint can support 20+ herb plants
Ebb and flow (flood and drain) — flood trays with nutrients on a timer, then drain completely; highly flexible for different plant sizes and grow mediums
Recirculating DWC (RDWC) — multiple buckets connected to a central reservoir; easy to scale and maintain at 10+ plants
Hydroponic Gardening
As you advance, you'll naturally explore different nutrient delivery options. If you're weighing liquid nutrients against solid alternatives, check out how to use fertilizer spikes for indoor plants — it's a useful comparison point even in a hydroponic context. You can also learn how to make your own fertilizer sticks if you prefer a hands-on DIY approach to plant nutrition.
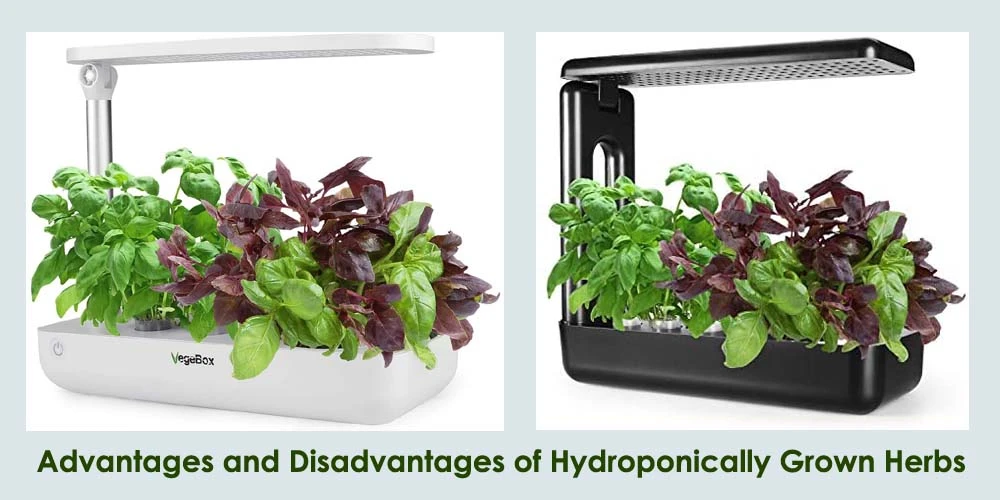
Common Mistakes to Avoid When Growing Herbs Hydroponically
Advantages And Disadvantages
Most beginner failures come down to a handful of predictable errors. Avoid these and you're already ahead of the majority of first-timers.
Nutrient and pH Errors
Over-fertilizing — more isn't better. Nutrient burn shows up as brown leaf tips caused by solution that's too concentrated. Always start at half-strength.
Ignoring pH — if your pH is off, your plants can't absorb nutrients even when they're present. This is called nutrient lockout. Test pH every 2–3 days.
Never changing the reservoir — nutrients deplete and salts build up. Do a complete reservoir change every 1–2 weeks, not just top-offs.
Using chlorinated tap water straight from the tap — let tap water sit uncovered overnight, or run it through a carbon filter. High chlorine levels harm beneficial root microbes.
Light and Environment Issues
Insufficient light — leggy, pale plants stretching toward the light source are starved for photons. Aim for 14–16 hours per day with a quality full-spectrum LED grow light.
Reservoir overheating — water above 75°F drops oxygen levels and invites disease. Keep your system away from heat sources and direct sunlight.
No light timer — plants need a consistent dark period. Running lights 24/7 stresses your herbs and reduces yield. Automate it from day one.
Algae growth — green slime in your reservoir is caused by light hitting the nutrient solution. Use opaque containers and cover any gaps around net pots.
Tip: A basic digital plug-in timer for your grow lights costs under $15 and eliminates one of the most common beginner mistakes — inconsistent light cycles — entirely.
Troubleshooting Your Hydroponic Herb Garden
Something doesn't look right and you're not sure why? Here's how to read your plants and fix the most common problems when growing herbs hydroponically.
Yellowing Leaves and Nutrient Deficiencies
Yellow leaves are the most common complaint from hydroponic herb growers. Each pattern tells you something different:
Yellowing from the bottom up — nitrogen deficiency. Increase nutrient concentration slightly or switch to a more nitrogen-forward formula.
Yellow leaves with green veins — iron deficiency caused by pH that's too high. Lower your pH toward 5.5–6.0 and the plant recovers within days.
Pale, washed-out yellow all over — either the light is too intense or the plant is getting heat stress from your grow light. Raise the fixture or reduce intensity.
Brown tips with yellow margins — nutrient burn. Dilute your solution immediately or do a full reservoir flush with fresh water at lower concentration.
Root Rot and Water Problems
Healthy roots are white, firm, and slightly fuzzy. Brown, slimy, or foul-smelling roots mean root rot — one of the most serious problems in any hydroponic system. Here's how to diagnose and fix it:
Cause: warm water — keep your reservoir below 72°F. Use a water chiller if needed, or add frozen water bottles during hot weather.
Cause: oxygen deprivation — upgrade your air pump or add additional air stones. Roots need constant, vigorous oxygenation.
Cause: light leaks — any light that reaches your root zone encourages algae and harmful organisms. Cover all gaps and openings in your reservoir lid.
Fix: hydrogen peroxide flush — 3% hydrogen peroxide at 3ml per gallon kills pathogens. Flush the full system, then restart with fresh nutrients.
Fix: beneficial bacteria — products like Hydroguard introduce beneficial microbes that outcompete root pathogens. Use preventatively, not just when problems appear.
Once your hydroponic herb garden is thriving, you'll need sharp tools to harvest cleanly without damaging plant stems. It's worth knowing how to sharpen your garden tools — even in a hydroponic setup, dull scissors and harvest snips cause bruising and invite disease at the cut site.
Next Steps
Choose your first herb and system today. Pick basil or mint and set up a simple Kratky mason jar system this week. Total cost is under $20 and you'll have plants in water by the end of the day.
Order a digital pH meter and starter nutrient solution. Don't skip this step. Test your water before your first plant goes in and dial it into the 5.5–6.5 range before anything else.
Set up a light timer from day one. Program it for 15 hours on, 9 hours off. Automate it so you never have to think about it again — consistency is everything for healthy growth.
Check your reservoir daily for the first two weeks. Spend five minutes each morning observing water levels, root color, and leaf appearance. Early problems are always easier and cheaper to fix.
Harvest early and harvest often. Don't wait for plants to get huge. Trim the top growth regularly to encourage bushy, productive growth. Your first usable harvest will come faster than you expect.
Christina Lopez grew up in the scenic city of Mountain View, California. For eighteen ascetic years, she refrained from eating meat until she discovered the exquisite delicacy of chicken thighs. Christina is a city finalist competitive pingpong player, an ocean diver, and an ex-pat in England and Japan. Currently, she is a computer science doctoral student. Christina writes late at night; most of her daytime is spent enchanting her magical herb garden.