Making a terrarium in a jar is straightforward: layer gravel, charcoal, soil, and plants inside any glass jar, then seal or leave it open depending on your plant choice. If you know how to make terrarium in jar setups correctly, you avoid the most common mistakes that kill plants in the first few weeks. For a popular variation, check out our guide on how to make a succulent terrarium.
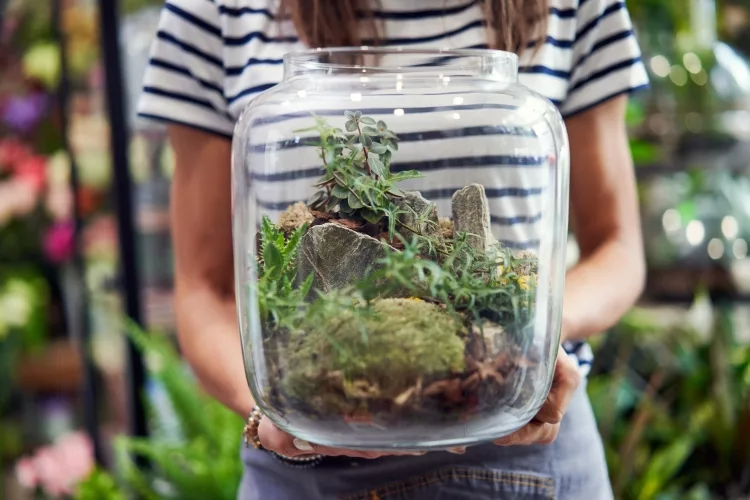
A jar terrarium is a miniature ecosystem you control. It needs almost no space, costs very little to build, and stays beautiful for months — or even years — with minimal effort. The secret is in the layering system: each layer does a specific job, and skipping one causes problems you can't always see until it's too late.
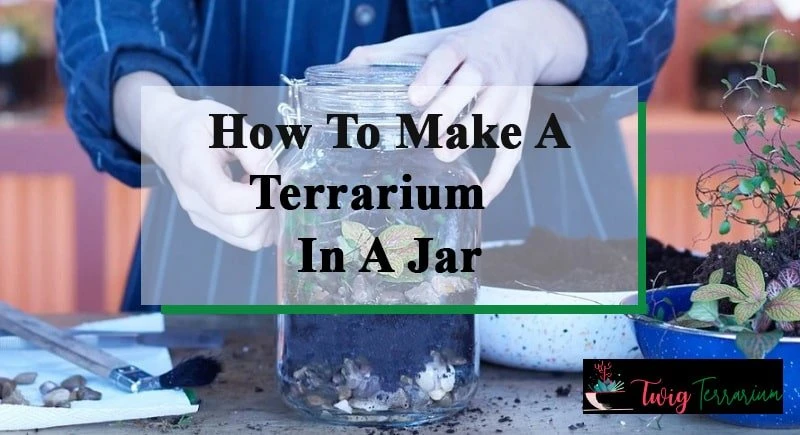
You don't need special tools or a green thumb to pull this off. With the right approach, you can build a thriving jar terrarium in under an hour. This guide walks you through everything: skill level, step-by-step construction, long-term care, real-world examples, and actual cost numbers.
Contents
If you're new to terrariums, start with an open jar and slow-growing plants. Open terrariums — those without a lid — are more forgiving because excess moisture evaporates naturally. You have more room for error, and the plants are easier to adjust or replace if something goes wrong.
The best beginner plants include:
Pick a wide-mouth mason jar with at least a 1-quart capacity. The wide opening lets you place plants easily and reach in to rearrange them later without knocking everything over. Beginners should always start with an open jar and drought-tolerant plants — this setup forgives overwatering and inconsistent light far better than a sealed environment.
Once you're comfortable with the basics, closed terrariums are the next level. A sealed jar creates its own water cycle — moisture evaporates from the soil, condenses on the glass walls, and drips back down to the roots. Done right, you barely need to water at all.
Closed systems work best with tropical moisture-loving plants:
Check out our full walkthrough on how to make a closed terrarium if you want to go that route. The drainage and plant selection rules differ slightly from open builds, and the margin for overwatering is much tighter.
Jar terrariums are one of the best greenery options for apartments and compact living spaces. They sit on a windowsill, bookshelf, or desk without demanding much room. A single jar brings life and texture to a corner that would otherwise be bare.
They work well in:
Jar terrariums make excellent, personalized gifts. You can customize the jar shape, the plant selection, and add small figurines, colored sand, or shells for a personal touch. They're popular at craft fairs and as DIY wedding favors because they're inexpensive to produce in batches.
If you enjoy growing plants in small containers, you'll also get a lot out of learning how to grow microgreens at home — another high-reward, low-space project that fits the same countertop. And if you ever want to scale your indoor growing beyond jars, our guide on how to make a small greenhouse shows exactly how to expand without breaking the budget.
Before you start, gather your materials. Nothing on this list is expensive or hard to find:
The layering order is critical. Each layer has a specific job, and the sequence cannot be reversed.
Get the layering right, and your terrarium practically maintains itself. According to Wikipedia's overview of terrariums, the concept dates to the 1800s when botanist Nathaniel Ward discovered plants thrived in sealed glass. Modern jar terrariums follow the same fundamental principle.
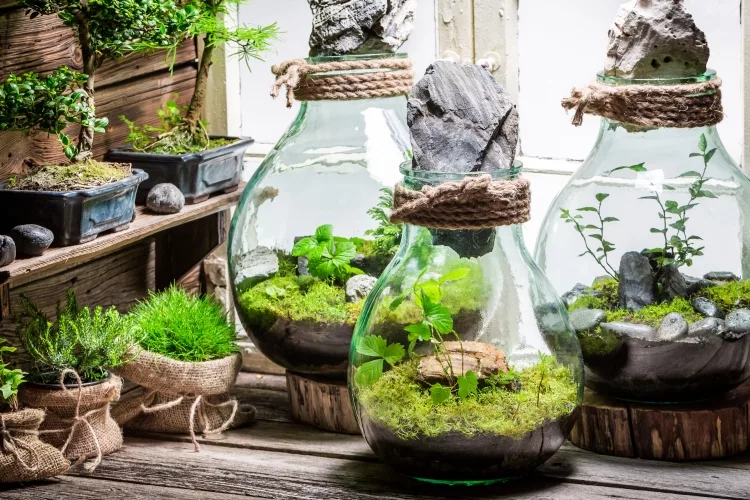
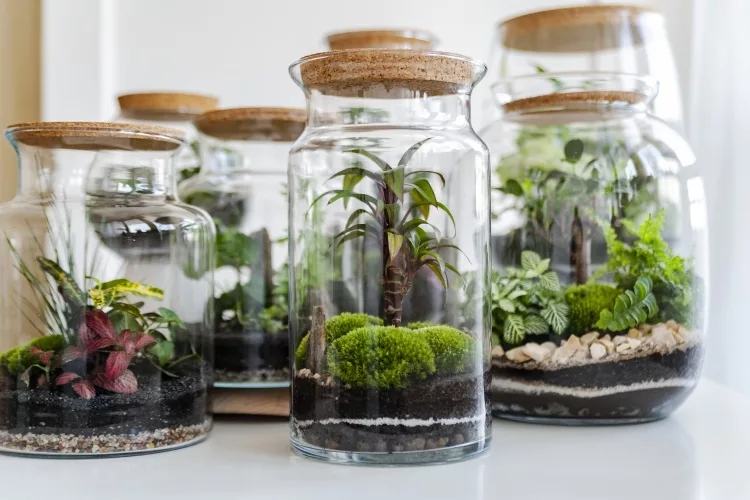
Jar size and shape affect how your build looks and functions. Tall, narrow jars work for single focal plants like a small fern or a specimen cactus. Wide, squat jars accommodate grouped arrangements with multiple plant types. The critical factor: make sure the opening is wide enough for your hand — or at minimum, a pair of long tweezers — to plant accurately without disturbing the layers.
Overwatering kills more terrariums than any other cause. Open terrariums need water every 1–2 weeks depending on plant type and ambient humidity. Closed terrariums can go weeks or even months without additional water once the ecosystem stabilizes.
The rule is simple: water only when the top inch of soil feels dry to the touch. For closed jars, if condensation appears on the walls every single day, leave the lid off for 24 hours to let excess moisture escape. Heavy, persistent condensation means the jar is holding too much water.
Most terrarium plants need bright, indirect light. Direct sunlight through glass acts as a magnifier — it overheats and scorches plants quickly. A spot near a north- or east-facing window is usually ideal.
Terrariums don't need heavy feeding. In a small jar, too much fertilizer causes rapid, leggy growth that quickly outgrows the container. Use homemade fertilizer sticks once every few months for a slow, controlled nutrient release — they're perfectly sized for small containers and won't burn roots the way liquid fertilizer can.
Remove dead or yellowing leaves as soon as you spot them. Decaying plant material inside a jar introduces bacteria and mold that spreads fast in a humid, enclosed space.
A mason jar filled with sheet moss, a few fern fronds, and a small piece of driftwood is one of the most reliable and visually striking builds you can make. It tolerates low light, stays lush with minimal care, and works beautifully as a sealed, self-sustaining ecosystem. This is the setup most people picture when they think of jar terrariums — and for good reason. It delivers every time.
A wide-mouth jar with a cactus mix base, a layer of sand on top, and two or three small succulents or cacti creates a drought-proof display that needs almost no attention. An open top is essential here — these plants rot quickly in sealed, humid environments. Growing a money plant follows similar low-maintenance principles if you want another easy indoor option that doesn't need daily care.
Air plants (Tillandsia) need no soil at all and absorb moisture directly from the air through their leaves. Layer decorative stones or bark in the jar, nestle one or two air plants among them, and mist every 1–2 weeks. Clean, minimal, and nearly impossible to overwater. Pair this with a small jar of catnip grown indoors nearby for a functional, aromatic herb display on the same shelf.
Always wash your jar with soap and hot water before building. Residue from previous use — whether food, dust, or soap film — introduces bacteria into the enclosed environment. Let the jar dry completely before adding any layers. Moisture trapped beneath the gravel layer causes root rot before your plants even get started, and you won't see it until leaves start dying.
A clean, dry jar is the foundation of every successful terrarium. Don't skip this step, even if the jar looks clean.
Never mix desert plants (cacti, succulents) with tropical plants (ferns, moss) in the same jar. They need opposite moisture levels, and one group will always suffer when you try to satisfy both. Stick to one ecosystem type per container.
Proven pairings that work:
Browse the gardening reviews section for tested tools that make terrarium building easier — from precision tweezers to quality activated charcoal products worth buying.
| Problem | Most Likely Cause | Fix |
|---|---|---|
| Yellowing leaves | Overwatering | Reduce watering frequency; verify drainage layer is thick enough |
| White mold on soil surface | Excess moisture, poor airflow | Remove affected soil, leave lid off for 24–48 hours |
| Plant stretching toward light | Insufficient light | Move jar closer to window or add a small grow light |
| Persistent daily condensation | Sealed jar holding too much water | Leave lid off for a full day, then reseal |
| Foul smell from jar | Bacterial growth, no charcoal layer | Rebuild layers with fresh charcoal; remove decaying material |
| Plants wilting in open jar | Underwatering or too much direct sun | Water thoroughly; move out of direct sunlight |
You can build a basic jar terrarium for under $15 using a mason jar and materials from any garden center or hardware store. Premium builds with specialty plants and decorative glass jars run $50–$90. The cost difference is almost entirely in the container and the plant selection.
| Item | Budget Option | Budget Cost | Premium Option | Premium Cost |
|---|---|---|---|---|
| Container | Mason jar (1 qt) | $2–$4 | Apothecary or geometric jar | $15–$30 |
| Gravel / pebbles | Aquarium gravel | $3–$5 | Polished decorative stones | $8–$12 |
| Activated charcoal | Generic garden bag | $4–$6 | Horticultural charcoal | $8–$10 |
| Potting mix | Standard potting soil | $3–$5 | Specialty tropical or cactus mix | $8–$12 |
| Plants | Nursery starter plants | $3–$6 | Rare species or established specimens | $15–$30 |
| Total | $15–$26 | $54–$94 |
The biggest cost driver isn't the jar — it's the plants. Here's how to keep costs low without compromising quality:

Moss, ferns, and selaginella work best in closed jar terrariums. Succulents and cacti work best in open jars. Never mix desert and tropical plants in the same jar — they have opposite moisture needs and one group will always struggle.
Yes. Activated charcoal absorbs odors, slows bacterial growth, and keeps the enclosed environment fresh. Without it, closed terrariums develop foul smells and mold buildup within weeks. A thin ½-inch layer placed between the gravel and soil is all you need.
Open terrariums need water every 1–2 weeks. Closed terrariums can go weeks or months without additional water once established. Always check the soil before watering — only add water when the top inch of soil feels dry.
Yes, as long as it's glass and has a wide enough opening for planting. Mason jars, apothecary jars, fish bowls, and even large pasta jars all work well. Avoid plastic — it scratches easily, clouds over time, and doesn't regulate temperature the way glass does.
Most jar terrarium plants need bright, indirect light for 4–6 hours daily. Keep the jar away from direct sunlight — glass intensifies heat and will scorch plants within days. A spot near a north- or east-facing window is usually the safest choice.
An open terrarium has no lid and allows moisture to evaporate freely — best for cacti and succulents. A closed terrarium is sealed and creates its own water cycle — best for tropical plants like moss and ferns. Your plant choice determines which type you should build.
Yellow leaves almost always signal overwatering. Check that your drainage layer is thick enough and that you're only watering when the top inch of soil is dry. If yellowing spreads, remove the plant, trim any rotted roots, and replant in fresh, dry soil.
A well-maintained jar terrarium lasts years. Closed moss terrariums have been known to thrive for decades with zero intervention once balanced. The key is starting with the right plants, using correct layering, and resisting the urge to overwater in the first few weeks while the ecosystem establishes itself.
 |
 |
 |
 |

About Truman Perkins
Truman Perkins is a Detroit-based SEO consultant who's been in the business for over a decade. He got his start helping friends and clients get their websites off the ground, and he continues to do so today. In his free time, Truman enjoys learning and writing about gardening - something he believes is a natural stress reliever. He lives with his wife, Jenny, and their twins in Detroit.
Get new FREE Gifts. Or latest free growing e-books from our latest works.
Disable Ad block to reveal all the links. Once done, hit a button below
|
|
|
|