Gardening Reviews

Tincture Making Supplies and Kits for Liquid Herbal Extracts at Home

reviewed by Christina Lopez

Have you ever wondered what it actually takes to turn fresh herbs into a powerful liquid extract — right in your own kitchen? The answer is more achievable than most people expect. Getting the right tincture making supplies at home is accessible to anyone who already works with plants, and if you grow herbs like those in your indoor chef's herb garden, you're already halfway there. You need a specific set of tools, a reliable solvent, and a solid method — that's it. This guide covers all three, plus honest cost breakdowns and the best herbs to use.

Tincture Making Supplies and Kits to Create Liquid Herbal Extracts at Home Easily

Tinctures are one of herbal medicine's oldest preservation methods. According to Wikipedia, a tincture is a solution of a medicinal substance dissolved in alcohol — a technique unchanged for centuries. Whether you're working with American ginseng root or leafy agrimony, the core extraction process is identical. Alcohol draws out alkaloids, resins, glycosides, and volatile oils that water-based preparations simply cannot dissolve — making tinctures far more concentrated and shelf-stable than teas or infusions.

If you already grow your own herbs, the transition to tincture-making is a natural extension of your practice. You're already cultivating the raw material — the right supplies just help you extract and preserve it properly. Our gardening reviews section covers equipment that pairs well with any home herb-growing setup. Once your baseline kit is in place, repeating batches becomes quick and routine.

The Right Tincture Making Supplies at Home: Equipment Guide

Your toolkit doesn't need to be expensive or complicated. The core setup is small, most pieces are reusable indefinitely, and several items may already be sitting in your kitchen. Here's exactly what you need — and why each item earns its place.

Herbal Tincture Supplies And Kits

Choosing Your Solvent

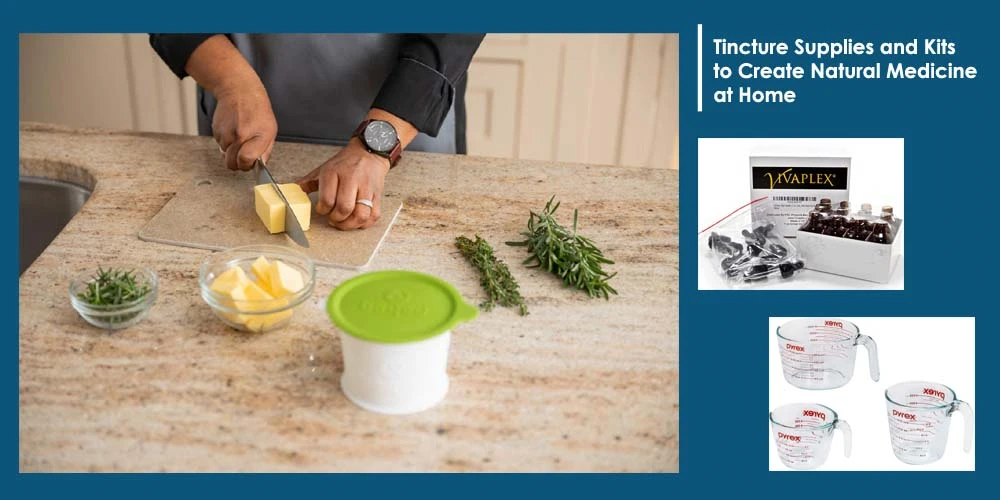
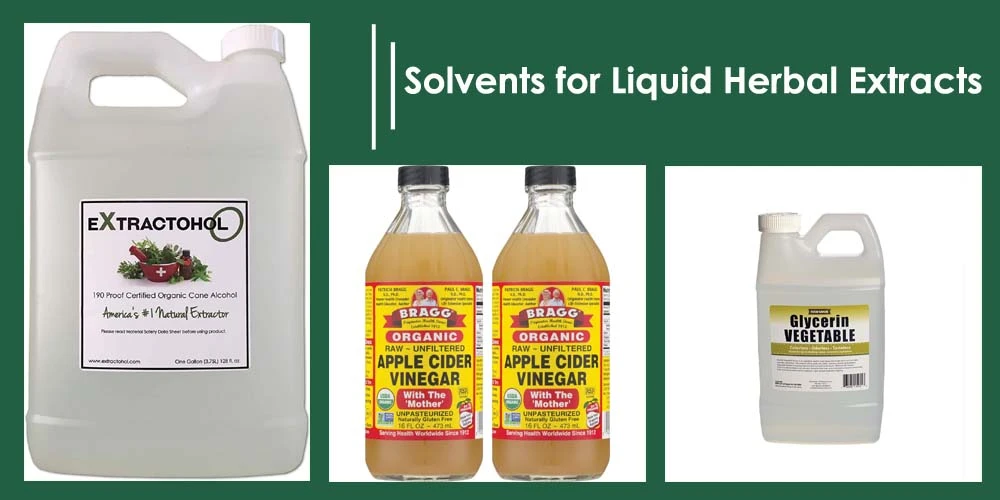
The solvent is the single most critical decision in your entire process. It determines what active compounds you extract, how potent the finished product is, and how long it stays good on the shelf.

  • Food-grade grain alcohol (80–95% ABV) — The gold standard. Extracts the widest range of constituents: resins, alkaloids, terpenes, and essential oils. Everclear at 95% is the most versatile option for resinous and aromatic herbs.
  • Vodka (40–50% ABV) — A practical middle ground for most culinary and medicinal herbs. Readily available, affordable, and reliable for roots, leaves, and flowers.
  • Vegetable glycerin — Alcohol-free. Extracts fewer active compounds but is safe for children and people avoiding spirits. Works best for mild, water-soluble herbs.
  • Apple cider vinegar — Budget-friendly and gentle, useful for mineral-rich herbs. Shelf life is far shorter than alcohol tinctures, so plan to use these batches within a year.

For most medicinal herbs, a 40–60% ethanol solution gives the best balance between extraction power and long-term stability. If you already use aromatic essential oils in your home wellness routine, you'll recognize that the volatile compounds making tinctures potent are the same ones that give aromatic herbs their characteristic scent.

Solvents For Liquid Herbal Extracts

Macerating Jars and Processing Containers

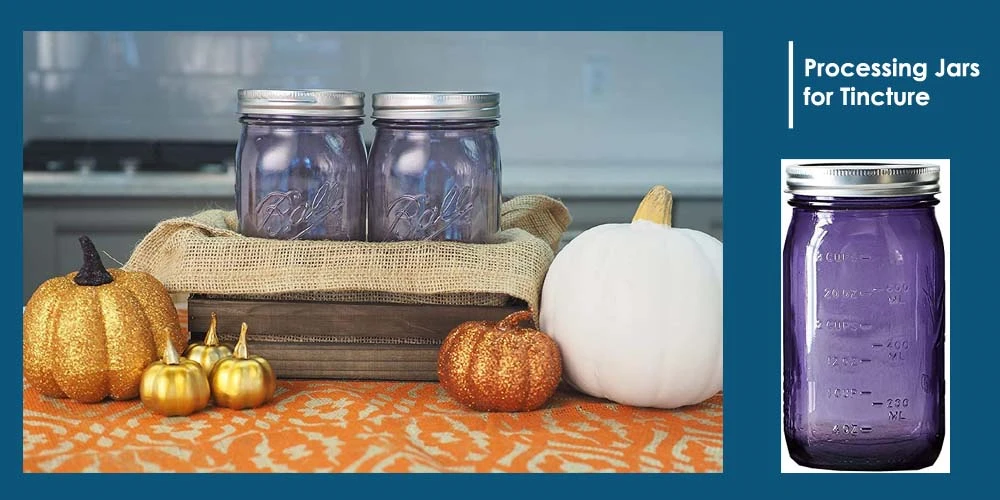
The maceration jar is where your herbs sit in solvent for weeks at a time. Choosing the right container protects your tincture from contamination, oxidation, and light degradation.

  • Wide-mouth glass mason jars (quart or half-pint size) are the standard choice — airtight, non-reactive with alcohol, and easy to sterilize and reuse indefinitely.
  • Use dark-tinted glass jars when available. If you're using clear jars, store them in a dark cabinet. Light degrades many active compounds during the 4–6 week maceration window.
  • Label every jar before sealing — herb name, solvent type, ABV percentage, and start date. Clear labeling prevents dangerous confusion between batches of similar-looking tinctures.
  • Never use plastic containers for alcohol-based tinctures. Ethanol degrades plastic over time and can introduce harmful leachates directly into your extract.
Processing Jars For Tincture

Straining and Filtering Equipment

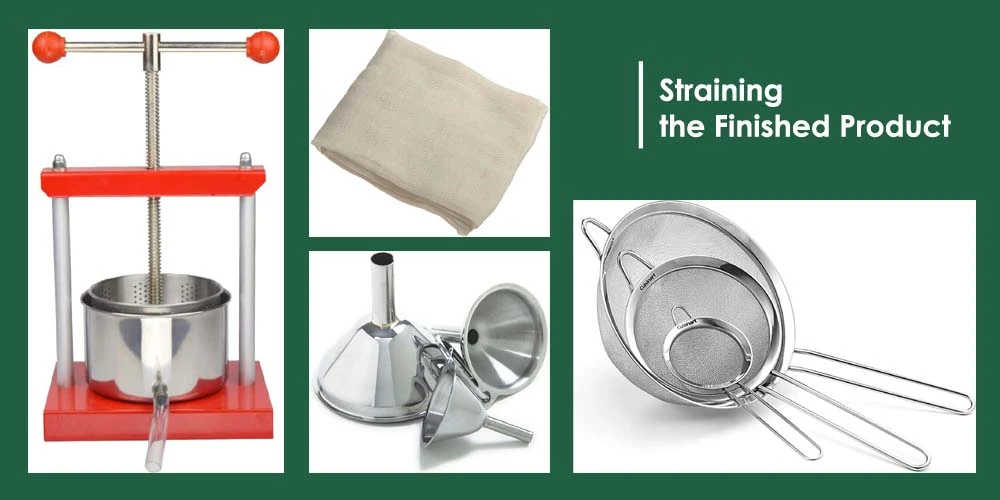
After maceration, separating plant material from the liquid cleanly and completely determines how much finished tincture you actually recover. A poor straining setup wastes extract you spent weeks producing.

  • Cheesecloth or muslin — First-pass straining for large plant debris. Food-grade cheesecloth from any grocery store works just as well as specialty herbalist versions.
  • Fine mesh stainless steel strainer — Second-pass filtration that removes finer particles cheesecloth misses. Stainless is non-reactive and easy to clean between uses.
  • Coffee filters or unbleached paper filters — Optional final polish for very clear, professional-quality results. Not essential for home use, but worth it if precision matters to you.
  • Tincture press or potato ricer — Don't underestimate this. The spent herb material (called marc) can hold up to 50% of your total tincture volume. Pressing it recovers extract you'd otherwise throw away.

Investing in a proper straining setup pays for itself on your first batch. You recover more product, reduce waste, and keep your prep area far cleaner.

Straining Kits For Tincture

Techniques That Maximize Your Extraction Results

Even with the right supplies, your method determines your final potency. Two approaches dominate home tincture-making — and knowing when to use each gives you a real edge over generic advice you'll find elsewhere.

Folk Method vs. Weight-to-Volume Method

The folk method is the traditional approach: fill a jar loosely with herbs, cover completely with solvent, seal, and macerate for 4–6 weeks. It's intuitive, requires no measuring equipment, and forgives minor variation. Best suited for fresh herbs and beginners building their first batches.

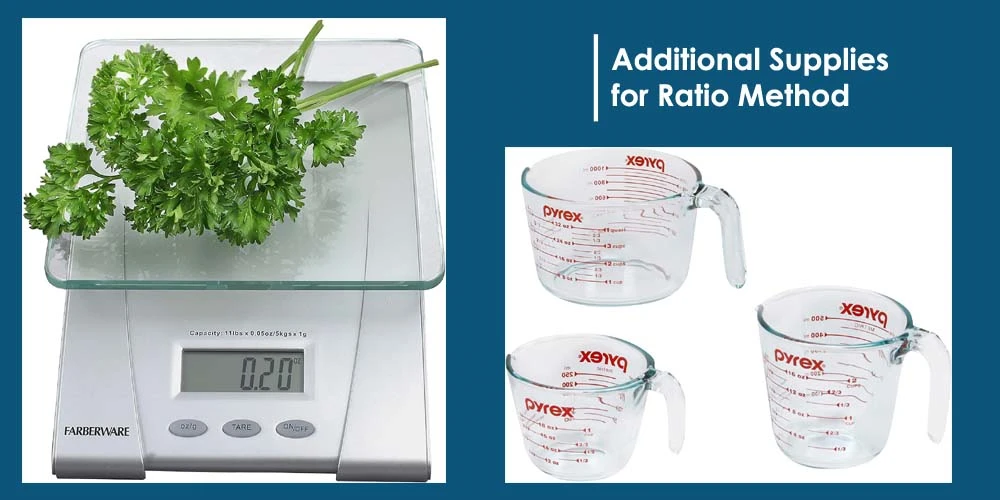
The weight-to-volume (w/v) method is the clinical standard used by professional herbalists. You weigh your dried herbs and measure your solvent to hit a specific ratio — a 1:5 ratio means 1 gram of herb per 5 ml of solvent. This gives you predictable, repeatable potency across every single batch you make.

  • Folk method: no scale required, works well for fresh herbs with high water content, ideal for casual home use
  • W/V method: requires a digital kitchen scale, best for dried herbs and standardized formulas you'll repeat
  • Both methods use identical equipment — the only difference is measurement discipline
  • If you plan to share tinctures with others or want consistent therapeutic results, the W/V method is the right choice

Timing, Ratios, and Practical Tips

  • Standard maceration: 4–6 weeks minimum. Shake or invert the jar once daily to agitate the herb-solvent mixture and maximize compound extraction.
  • Wilt fresh herbs for 24 hours before packing the jar. Fresh plant tissue holds significant water — wilting reduces moisture content that would otherwise dilute your alcohol percentage and weaken the final extract.
  • Chop or coarsely grind dried herbs before adding them to the jar. More surface area means faster, more complete extraction of bioactive compounds.
  • Keep jars at consistent room temperature, away from heat sources and direct light. A dark pantry shelf is ideal.
  • After straining, bottle immediately in amber glass dropper bottles. Amber glass blocks UV light; rubber bulb droppers allow precise dosing without contaminating the batch.
  • Date every finished bottle. Properly prepared alcohol tinctures at 40%+ ABV remain stable and potent for several years with correct storage.
Kits For Making Tincture
Herbs For Tincture Making

What Tincture Making Supplies Actually Cost

One of tincture-making's most underrated advantages is the low startup cost. A fully functional kit costs less than most kitchen appliances — and the reusable hardware means your ongoing costs are minimal after the first batch.

Starter Setup: What You Need to Spend

Here's a realistic cost breakdown for a complete starter tincture kit:

SupplyCategoryEstimated CostNotes
Mason jars (4-pack, quart)Essential$8–$12Reusable indefinitely with proper cleaning
Grain alcohol or vodka (750 ml)Essential$12–$25Choose ABV based on herb type
Cheesecloth (5 yards)Essential$3–$6Multiple uses per yard
Fine mesh stainless strainerEssential$8–$15Stainless steel preferred over plastic mesh
Amber dropper bottles (12-pack)Essential$10–$181 oz or 2 oz glass with rubber bulb dropper
Digital kitchen scaleRecommended$10–$20Required for the weight-to-volume method
Tincture press or ricerOptional upgrade$15–$40Noticeably improves yield on every batch
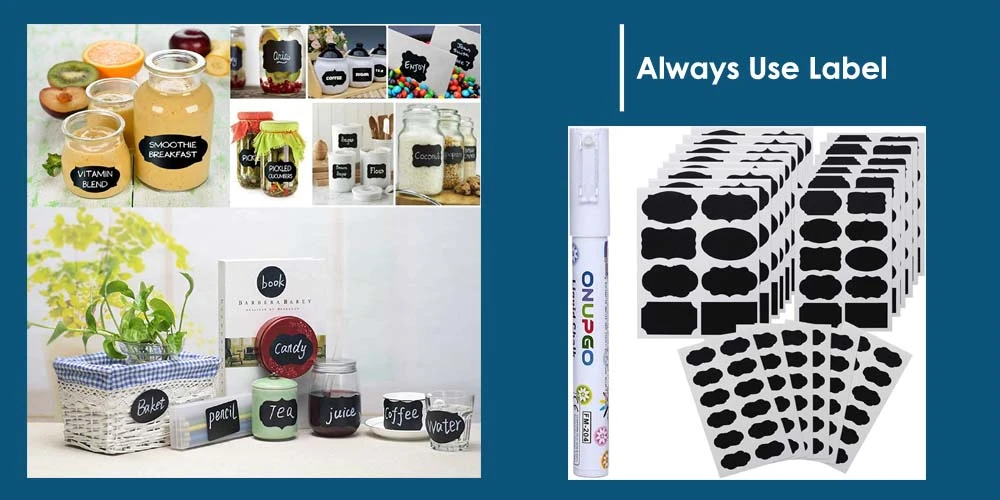
Waterproof labelsRecommended$4–$8Essential for safety, organization, and dosing accuracy

Total starter investment: $55–$144 depending on quality and what you already own. After your initial setup, repeat batches cost mainly the price of herbs and solvent — typically under $15 per batch for common medicinal herbs.

Storage Bottles For Tincture

Where to Save and Where to Splurge

Not every item in your kit deserves the same budget scrutiny. Some corners are safe to cut; others cost you far more than the savings you gained.

  • Save on jars — Standard mason jars perform identically to specialty tincture jars sold at premium prices through herbal supply shops.
  • Splurge on dropper bottles — Cheap plastic caps crack, warp, and leak. Glass amber bottles with quality rubber bulb droppers are worth every additional cent.
  • Save on cheesecloth — Food-grade cheesecloth from your local grocery store works just as well as specialty versions marketed to herbalists.
  • Splurge on alcohol — Higher-proof spirits produce more complete extractions, especially for resinous or aromatic herbs. The difference in your finished tincture is noticeable and measurable.
  • Avoid all-in-one starter "tincture kits" that bundle unnecessary accessories and charge a steep convenience premium. Buying individual components gives you significantly better value and the flexibility to upgrade one piece at a time.
Label For Tincture
Label For Tincture

Herb Selection and Long-Term Care for Your Tincture Supply

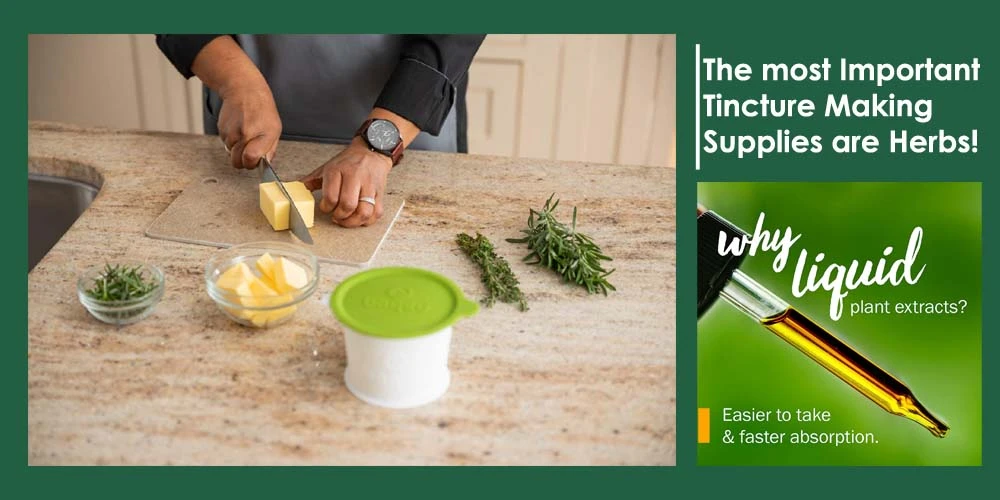
The quality of your tincture is directly tied to the quality of your plant material. No amount of good equipment compensates for weak or improperly stored herbs. Knowing which plants extract reliably — and how to keep them at peak potency — is as important as any tool you own.

The Best Herbs to Start With

These herbs extract reliably, are well-documented for home use, and are straightforward for beginners to grow or source:

  • Echinacea — Strong immune support, highly suited to alcohol extraction, easy to grow in temperate climates with very little maintenance
  • Valerian root — Significantly more potent in tincture form than tea; harvest root in fall after the plant dies back for the best alkaloid concentration
  • Lemon balm — Calming, gentle, and beginner-forgiving; fresh-plant tinctures are especially effective for this species
  • Chamomile — Anti-inflammatory, extensively researched, and mild-flavored enough to make daily dosing easy to stick to
  • Aloe vera — Supports skin and digestive health; use only the clear inner gel for tincturing, never the bitter latex layer directly beneath the skin
  • Alfalfa — Rich in bioavailable vitamins and minerals; particularly well-suited to glycerin-based tinctures for those avoiding alcohol

As your confidence grows, expand into more complex roots and resins. American ginseng is one of the most sought-after herbs for home tinctures — deeply potent, well-studied, and well worth growing yourself once you have a reliable extraction setup in place.

Growing, Harvesting, and Storing Your Herbs

  • Harvest aerial parts just before peak bloom — leaves and flowers carry the highest concentration of volatile compounds when the plant is on the verge of flowering. Roots are best taken in fall after the plant has drawn energy back underground for dormancy.
  • Dry herbs slowly at low temperature — under 100°F (38°C) — to preserve fragile volatile compounds. A food dehydrator at its lowest setting is ideal; direct sunlight and oven heat destroy what you're trying to preserve.
  • Store dried herbs in airtight glass jars away from light and heat. Properly dried and stored plant material holds its potency for one to two years before significant degradation occurs.
  • For fresh-plant tinctures, process the herbs within hours of harvest. Wilt the plant briefly to reduce surface moisture before packing your jar — this prevents unwanted dilution of your solvent.
  • Growing from seed gives you the freshest, most potent raw material available. Buying medicinal herb seeds online expands your options well beyond what local nurseries stock, including harder-to-find varieties like ashwagandha, holy basil, and valerian.

Frequently Asked Questions

What is the best alcohol percentage for making tinctures at home?

For most dried herbs, 40–60% ABV — the range covered by standard vodka — provides effective extraction and solid shelf stability. For very resinous herbs like myrrh or propolis, use 70–95% grain alcohol to fully dissolve the resins. Match your solvent strength to the specific compounds you're targeting, not a one-size-fits-all percentage.

How long do homemade tinctures last?

Alcohol tinctures made with 40% ABV or higher solvent remain stable and potent for several years when stored in amber glass bottles away from heat and light. Glycerin-based tinctures have a shorter shelf life of one to two years. Always label bottles with the preparation date so you can track freshness accurately over time.

Can I use fresh herbs instead of dried for tinctures?

Yes — and for certain herbs, fresh is clearly superior. Fresh lemon balm, St. John's wort, and echinacea flower all produce noticeably stronger tinctures than their dried equivalents. The key step is wilting fresh material for 24 hours before packing the jar, which reduces the excess water that would otherwise dilute your alcohol percentage and weaken the extraction.

Do I need specialized tincture-making equipment, or can I use regular kitchen tools?

Standard kitchen tools handle the majority of the work. Wide-mouth mason jars, a fine mesh strainer, and cheesecloth are sufficient to complete your first batch. A digital kitchen scale and a tincture press both upgrade your precision and yield meaningfully, but neither is required to get started. Add equipment as you build the practice and understand where the gaps in your process actually are.

Key Takeaways

  • A complete set of tincture making supplies at home costs $55–$144 to start, with most equipment reusable across dozens of future batches.
  • Food-grade alcohol at 40–60% ABV is the most effective and shelf-stable solvent for the widest range of medicinal herbs.
  • The weight-to-volume method produces more consistent, repeatable potency than the folk method — worth adopting once you're making the same formula regularly.
  • The quality of your plant material is the single biggest variable in your finished tincture — grow your own herbs and harvest at peak potency for the best results.
Christina Lopez

About Christina Lopez

Christina Lopez grew up in the scenic city of Mountain View, California. For eighteen ascetic years, she refrained from eating meat until she discovered the exquisite delicacy of chicken thighs. Christina is a city finalist competitive pingpong player, an ocean diver, and an ex-pat in England and Japan. Currently, she is a computer science doctoral student. Christina writes late at night; most of her daytime is spent enchanting her magical herb garden.


Follow Christina:

Get new FREE Gifts. Or latest free growing e-books from our latest works.

Disable Ad block to reveal all the links. Once done, hit a button below