You heat a greenhouse by matching the right method to your climate, budget, and the crops you're growing. Whether you rely on electric heaters, hot water systems, or passive solar mass, knowing how to heat greenhouse spaces properly is the difference between a thriving winter garden and a frozen disappointment. Most growers combine two or three approaches for the best results — and that's exactly what we'll walk through here. If you're already growing warm-season crops like cherry tomatoes or tender herbs in your greenhouse, temperature control isn't optional — it's everything.

The good news is that greenhouse heating doesn't have to be complicated or expensive. Some of the most effective strategies cost almost nothing upfront. Others require an investment but pay for themselves in extended growing seasons and healthier plants. The key is understanding what each method does well — and where it falls short.
Below, you'll find a full breakdown of proven heating methods, a side-by-side comparison to help you decide, and practical fixes for the most common problems growers face when temperatures drop. Let's get your greenhouse dialed in for year-round production.
Contents
Before diving into the details, here's a quick comparison of the most popular ways to heat a greenhouse. Each method has trade-offs in cost, efficiency, and practicality. Use this table to narrow your options, then read on for the specifics.
| Method | Upfront Cost | Running Cost | Best For | BTU Output |
|---|---|---|---|---|
| Electric fan heater | Low ($30–$150) | High | Small greenhouses under 100 sq ft | 5,000–15,000 |
| Propane/gas heater | Medium ($100–$500) | Medium | Mid-size structures, quick warmup | 10,000–80,000 |
| Hot water radiant system | High ($500–$3,000+) | Low–Medium | Large or commercial greenhouses | Variable |
| Wood/biomass stove | Medium ($200–$800) | Low | Rural areas with wood access | 20,000–60,000 |
| Thermal mass (water barrels) | Very Low ($0–$50) | None | Passive supplemental heat | Minimal |
| Compost/hotbed heating | Low ($0–$100) | None | Raised beds, seed starting | Low–Moderate |
| Geothermal (GAHT/SHCS) | High ($1,000–$5,000) | Very Low | Year-round growers, cold climates | Moderate–High |
| Solar panels + heater | High ($1,500+) | Very Low | Off-grid setups | Variable |
| Bubble wrap insulation | Very Low ($10–$40) | None | Heat retention (not generation) | N/A |
| Heat mats/cables | Low ($20–$80) | Low | Seed germination, propagation | Low |
Electric fan heaters are the easiest entry point. Plug one in, set the thermostat, and walk away. They distribute heat evenly and work well for hobby greenhouses. The downside is your electricity bill — running a 1,500-watt heater for 12 hours a day adds up fast. Propane and natural gas heaters deliver more BTUs per dollar and heat larger spaces efficiently, but they require ventilation to prevent CO₂ buildup and moisture problems.
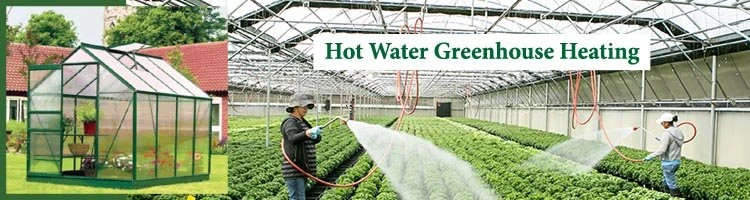
Hot water radiant systems are the gold standard for serious growers. Pipes run under benches or through the floor, radiating gentle, consistent warmth right at root level. The initial installation is significant, but operating costs stay low — especially if you pair the boiler with a wood-burning or biomass source. This is the method commercial greenhouses have relied on for decades.
Thermal mass works on a simple principle: dense materials absorb heat during the day and release it slowly at night. Black-painted water barrels are the classic example. Line the north wall of your greenhouse with 55-gallon drums filled with water, and they'll buffer temperature swings by 5–10°F through the night. It's not enough on its own in January in Vermont, but it's a powerful supplement to any active system.
Compost heating is another underrated approach. A fresh pile of nitrogen-rich compost generates internal temperatures of 130–160°F as microbes do their work. Running PEX tubing through the pile lets you capture that heat and pipe it into your growing space. Growers in the plants, herbs, and farming space have been using this technique for centuries — it's just getting rediscovered now.
Don't overlook the simplest upgrade: sealing air leaks around doors, vents, and glazing joints can cut your heating costs by 20–30% overnight — no new equipment required.
A greenhouse without supplemental heat is just a cold frame with ambition. Glass and polycarbonate trap solar radiation during the day, but they're terrible insulators. On a clear winter night, an unheated greenhouse can drop to within a few degrees of outside temperature. That's fine for overwintering dormant perennials, but it's a death sentence for tomatoes, peppers, basil, and most of the crops people actually build greenhouses to grow.

Understanding heat loss helps you target your efforts. According to the Wikipedia entry on greenhouses, the primary mechanisms are conduction through glazing, convection through air leaks, and radiation to the cold night sky. Single-pane glass loses roughly twice as much heat as double-wall polycarbonate. Gaps around doors and vents create convection loops that pull warm air out and draw cold air in. Even the floor radiates heat downward into the earth if it isn't insulated.
The takeaway: heating a leaky greenhouse is like running the furnace with your windows open. Before you spend money on a bigger heater, spend time on insulation and sealing. Bubble wrap applied to the interior glazing adds a dead-air layer that cuts conduction losses by up to 50%. Weatherstripping around doors and vents handles convection. A layer of rigid foam insulation under your floor or along the foundation perimeter stops ground losses.
How much heat you need depends entirely on what you're growing. Cool-season crops like lettuce, spinach, and kale tolerate temperatures down to 28°F without damage. You can grow microgreens at home in a greenhouse that stays just above freezing. But warm-season crops need significantly more heat. Tomatoes stall below 50°F and suffer cellular damage below 33°F. Basil — one of the most popular indoor herbs to grow — blackens at the first hint of frost. Tropical plants like turmeric and avocados need nighttime minimums of 55–60°F, which means serious heating in most climates.
Match your heating investment to your crop plan. If you only want fresh salad greens through winter, thermal mass and a small backup heater will handle it. If you're producing warm-season vegetables or starting transplants for spring, you need reliable, thermostat-controlled heat that keeps nighttime lows above 50°F.
You don't need to overhaul your greenhouse to see real improvements. These low-cost moves make a measurable difference, and most take less than an afternoon to implement.
Fill dark-colored containers with water and place them where they'll catch direct sun. The water absorbs heat all day and releases it slowly after sunset. For a 6×8-foot greenhouse, four to six 5-gallon buckets along the north wall provide a meaningful buffer. Larger setups benefit from 55-gallon drums. You can also use concrete blocks, stone slabs, or even stacked bricks — anything dense and dark. The more mass you add, the more stable your temperatures become.
Position your thermal mass where it won't shade your plants. The north wall is ideal in the Northern Hemisphere because it never blocks direct sunlight from reaching your growing area. If you're using water barrels, paint them flat black for maximum absorption.
Horticultural bubble wrap is purpose-built for greenhouse insulation, but standard large-bubble packing wrap works nearly as well at a fraction of the price. Press it against the interior glazing, bubble-side in, and secure it with clips or double-sided tape. This creates a trapped air layer that dramatically slows heat transfer. Focus on the north wall and roof first — those surfaces lose the most heat.
A single layer of bubble wrap on your glazing reduces heat loss by up to 50% — it's the highest-impact, lowest-cost upgrade you can make to any greenhouse.
Row covers and horticultural fleece add another layer of protection directly over your plants. On the coldest nights, draping lightweight fleece over your growing beds creates a microclimate that's 4–8°F warmer than the surrounding air. It's the same principle gardeners use outdoors to protect against late frosts, and it works just as well inside a greenhouse. If you're growing tender crops like turmeric, that extra buffer can mean the difference between a healthy plant and a ruined crop.
Once you have a heating system in place, these strategies help you squeeze more performance out of it without increasing your energy bill.
Not every plant in your greenhouse needs the same temperature. Cold-hardy greens are fine at 35°F, while your pepper starts need 65°F. Zone heating means directing warmth where it's needed most instead of heating the entire volume to the highest temperature any single crop requires.
Create zones using physical barriers — clear plastic curtains hung from overhead beams work well. Put your heat-loving plants in the smallest enclosed zone with the heater, and let hardier crops occupy the cooler perimeter. This approach can cut energy consumption by 30–40% compared to heating the whole greenhouse uniformly. If you've worked with grow tents, you already understand the principle — a smaller enclosed space is far easier and cheaper to heat than an open one.
Heat mats and soil cables are another form of zone heating. They deliver warmth directly to the root zone where plants need it most. A propagation mat set to 75°F under seed trays uses a fraction of the energy that heating ambient air to the same temperature would require. For seed starting and propagation, bottom heat is more effective than air heat — roots drive growth, and warm roots in cool air produce stockier, healthier transplants than the reverse.
A thermostat is not optional — it's essential. Without one, you're either overheating your greenhouse and wasting money, or under-heating it and losing plants. Digital thermostats with remote sensors let you monitor conditions from your phone and set different temperatures for day and night. Most crops benefit from a 10–15°F nighttime temperature drop, which mirrors natural conditions and saves significant energy.
Pair your thermostat with a min/max thermometer so you can track the actual temperature range your greenhouse hits over 24 hours. You might discover that your heater kicks off at 2 AM and the temperature crashes before dawn. That data tells you whether you need more insulation, more thermal mass, or a larger heater. Good data prevents expensive guesswork.
For growers running multiple heating sources — say, a gas heater as primary and heat mats as supplemental — a two-stage thermostat makes the system seamless. The mats run continuously at a low setpoint, and the gas heater fires only when temperatures drop below a second, lower threshold. This layered approach keeps energy costs down while providing reliable frost protection.
Even well-designed heating setups run into issues. Here are the problems growers encounter most often and how to solve them.
Cold spots happen when heated air doesn't circulate evenly. Corners, areas near doors, and spots far from the heater are the usual culprits. The fix is simple: add a circulation fan. A small oscillating fan running on low keeps air moving and prevents thermal stratification — the phenomenon where hot air rises to the ridge and cold air settles at plant level.
Position your circulation fan to push air horizontally across the growing area, not pointed at plants. You want gentle, continuous movement that mixes the air column. In larger greenhouses, install horizontal air flow (HAF) fans spaced every 20–30 feet in a circular pattern. The energy cost is minimal — a 20-watt fan running 24/7 costs pennies per day — but the effect on temperature uniformity is dramatic.
If cold spots persist near the foundation or floor, consider perimeter insulation. Rigid foam board (R-10 or higher) buried vertically along the outside of your foundation to a depth of 18–24 inches stops the ground from conducting heat away from the greenhouse interior. This is especially important in cold climates where the soil itself becomes a heat sink.
Heating a greenhouse without managing humidity is asking for fungal problems. Warm, moist air is the perfect breeding ground for botrytis, powdery mildew, and damping-off disease. When you heat the air inside your greenhouse, you increase its capacity to hold moisture. When that warm air contacts cold glazing, it condenses — dripping water onto your plants and creating exactly the conditions pathogens love.
Ventilation is the primary tool for humidity control. Even in winter, you need some air exchange. Crack a vent on the leeward side of the greenhouse during the warmest part of the day to let moist air escape. This feels counterintuitive when you're paying to heat the space, but 15–20 minutes of venting around midday keeps humidity in the safe range (below 80% relative humidity) without significantly dropping the temperature.
Drip irrigation instead of overhead watering reduces the amount of moisture entering the air. Water early in the day so surfaces dry before nightfall. Keep the greenhouse floor clean of standing water and decaying plant material. These habits work alongside your heating system to create a growing environment that promotes healthy plants rather than disease. It's the same principle that makes proper watering practices so critical whether you're managing a greenhouse or figuring out how often to water your vegetable garden outdoors.
Thermal mass — specifically, black-painted water barrels — costs almost nothing and provides meaningful passive heating. Combine water barrels with bubble wrap insulation and sealed air gaps, and you have a system that buffers nighttime temperatures by 5–15°F without any energy costs. For active heating on a budget, a propane heater with a thermostat delivers the most BTUs per dollar spent.
Yes. A fresh compost pile generates internal temperatures between 130–160°F during active decomposition. By running PEX tubing through the pile and circulating water to your greenhouse, you can capture that heat for weeks. The method works best as supplemental heat rather than a primary source, because output drops as the compost matures. Plan to turn or refresh the pile every 4–6 weeks for sustained performance.
It depends on your crops. Cool-season greens like lettuce and spinach survive down to 28°F. Most warm-season vegetables need nighttime minimums of 50°F. Tropical plants require 55–60°F or higher. Set your thermostat to the minimum temperature your most sensitive crop requires, and use zone heating to avoid over-heating the entire space for the sake of a few tender plants.
The best greenhouse heating system isn't the most expensive one — it's the combination of insulation, thermal mass, and targeted heat that keeps your plants alive without burning through your budget.
 |
 |
 |
 |

About Christina Lopez
Christina Lopez grew up in the scenic city of Mountain View, California. For eighteen ascetic years, she refrained from eating meat until she discovered the exquisite delicacy of chicken thighs. Christina is a city finalist competitive pingpong player, an ocean diver, and an ex-pat in England and Japan. Currently, she is a computer science doctoral student. Christina writes late at night; most of her daytime is spent enchanting her magical herb garden.


Get new FREE Gifts. Or latest free growing e-books from our latest works.
Disable Ad block to reveal all the links. Once done, hit a button below
|
|
|
|
 rinjal